This is my summary of the steps I took while experimenting with ASP.Net Core 2.1 Preview’s new React template to get a DevOps environment up and running for a new project.
To summarize the stack being used is as follows:
- ASP.Net Core 2.1 Preview
- New project with the React project template
- Visual Studio 2017 15.7 (Preview 3) [only if you want to edit the project before pushing it to the repository], you can also just use Visual Studio Code with appropriate add-ons.
- Visual Studio Team Services and Git
- Microsoft Azure App Service Web Apps
- Chocolatey package manager for the bits and pieces not yet installed
- NVM for Windows for managing Node/NPM versions
Why so bleeding edge?
Simply, the new React template included in .NET Core 2.1 Preview is a much cleaner implementation than what was available in .Net Core 2.0 in my opinion, as where the previous version had the usual Microsoft pattern of ‘customize at will’, the new template seems to keep the spirit of the React community in how it goes about deploying React as a front end project. This new ASP.Net Core React template utilizes an ASP.Net Core Web API project meant to be used for back-end heavy lifting (e.g. authentication, database etc) and keeps a true create-react-app generated application for the front-end project. I also chose to Visual Studio Team Services instead of my usual preference for Github as it provided a quick way to get both a Git repository up and running and its Build and Release features work nicely with hosting on Microsoft Azure.
Step 1: Setup developer workstation
So the first part of setup is to get ASP.Net Core 2.1 Preview installed on a local developer workstation. Since we are also going to be using React for this project we also want to have a recent version of npm available. Since node version management is a recurring issue I’ve hit in the past with Microsoft stack products integrating with open source technology, I’ve tended to use nvm for Windows to manage this, since even though it’s been lax on recent activity or maintainers, it’s been reliable and still works with the latest versions of node and npm. Open an Administrator PowerShell and run the following:
#Setup git
choco install -y --allow-empty-checksums git
Refreshenv.cmd
env:Path = [System.Environment]::GetEnvironmentVariable("Path","Machine") + ";" + [System.Environment]::GetEnvironmentVariable("Path","User")
git config --global user.name "Your Name"
git config --global user.email "your@email.com"
git config --global color.ui auto
#Setup nvm and node/npm
choco install -y --allow-empty-checksums nvm
nvm install 9.5.0
nvm use 9.5.0
#Setup ASP.Net 2.1 Preview
choco install dotnetcore-sdk --pre
#refresh environment variables
env:Path = [System.Environment]::GetEnvironmentVariable("Path","Machine") + ";" + [System.Environment]::GetEnvironmentVariable("Path","User")
Even if you never used Visual Studio Team Services, it really simple to get started and you can configure a new project for free following these instructions. Now assuming that is setup, we clone the repository that we setup in Visual Studio Team Services to a local workstation directory, and change to that directory and run the following to setup our new application, which is simply a ASP.Net Core Web API project for the back-end plumbing and a React frontend project based on create-react-app templating.
dotnet new react -o my-new-app
cd my-new app
dotnet install tool dotnet-dev-certs -g --version 2.1.0-preview1-final
dotnet-dev-certs https --trust
#Set ASP.Net Development environment
Set-Variable ASPNETCORE_Environment=Development
dotnet build
dotnet run
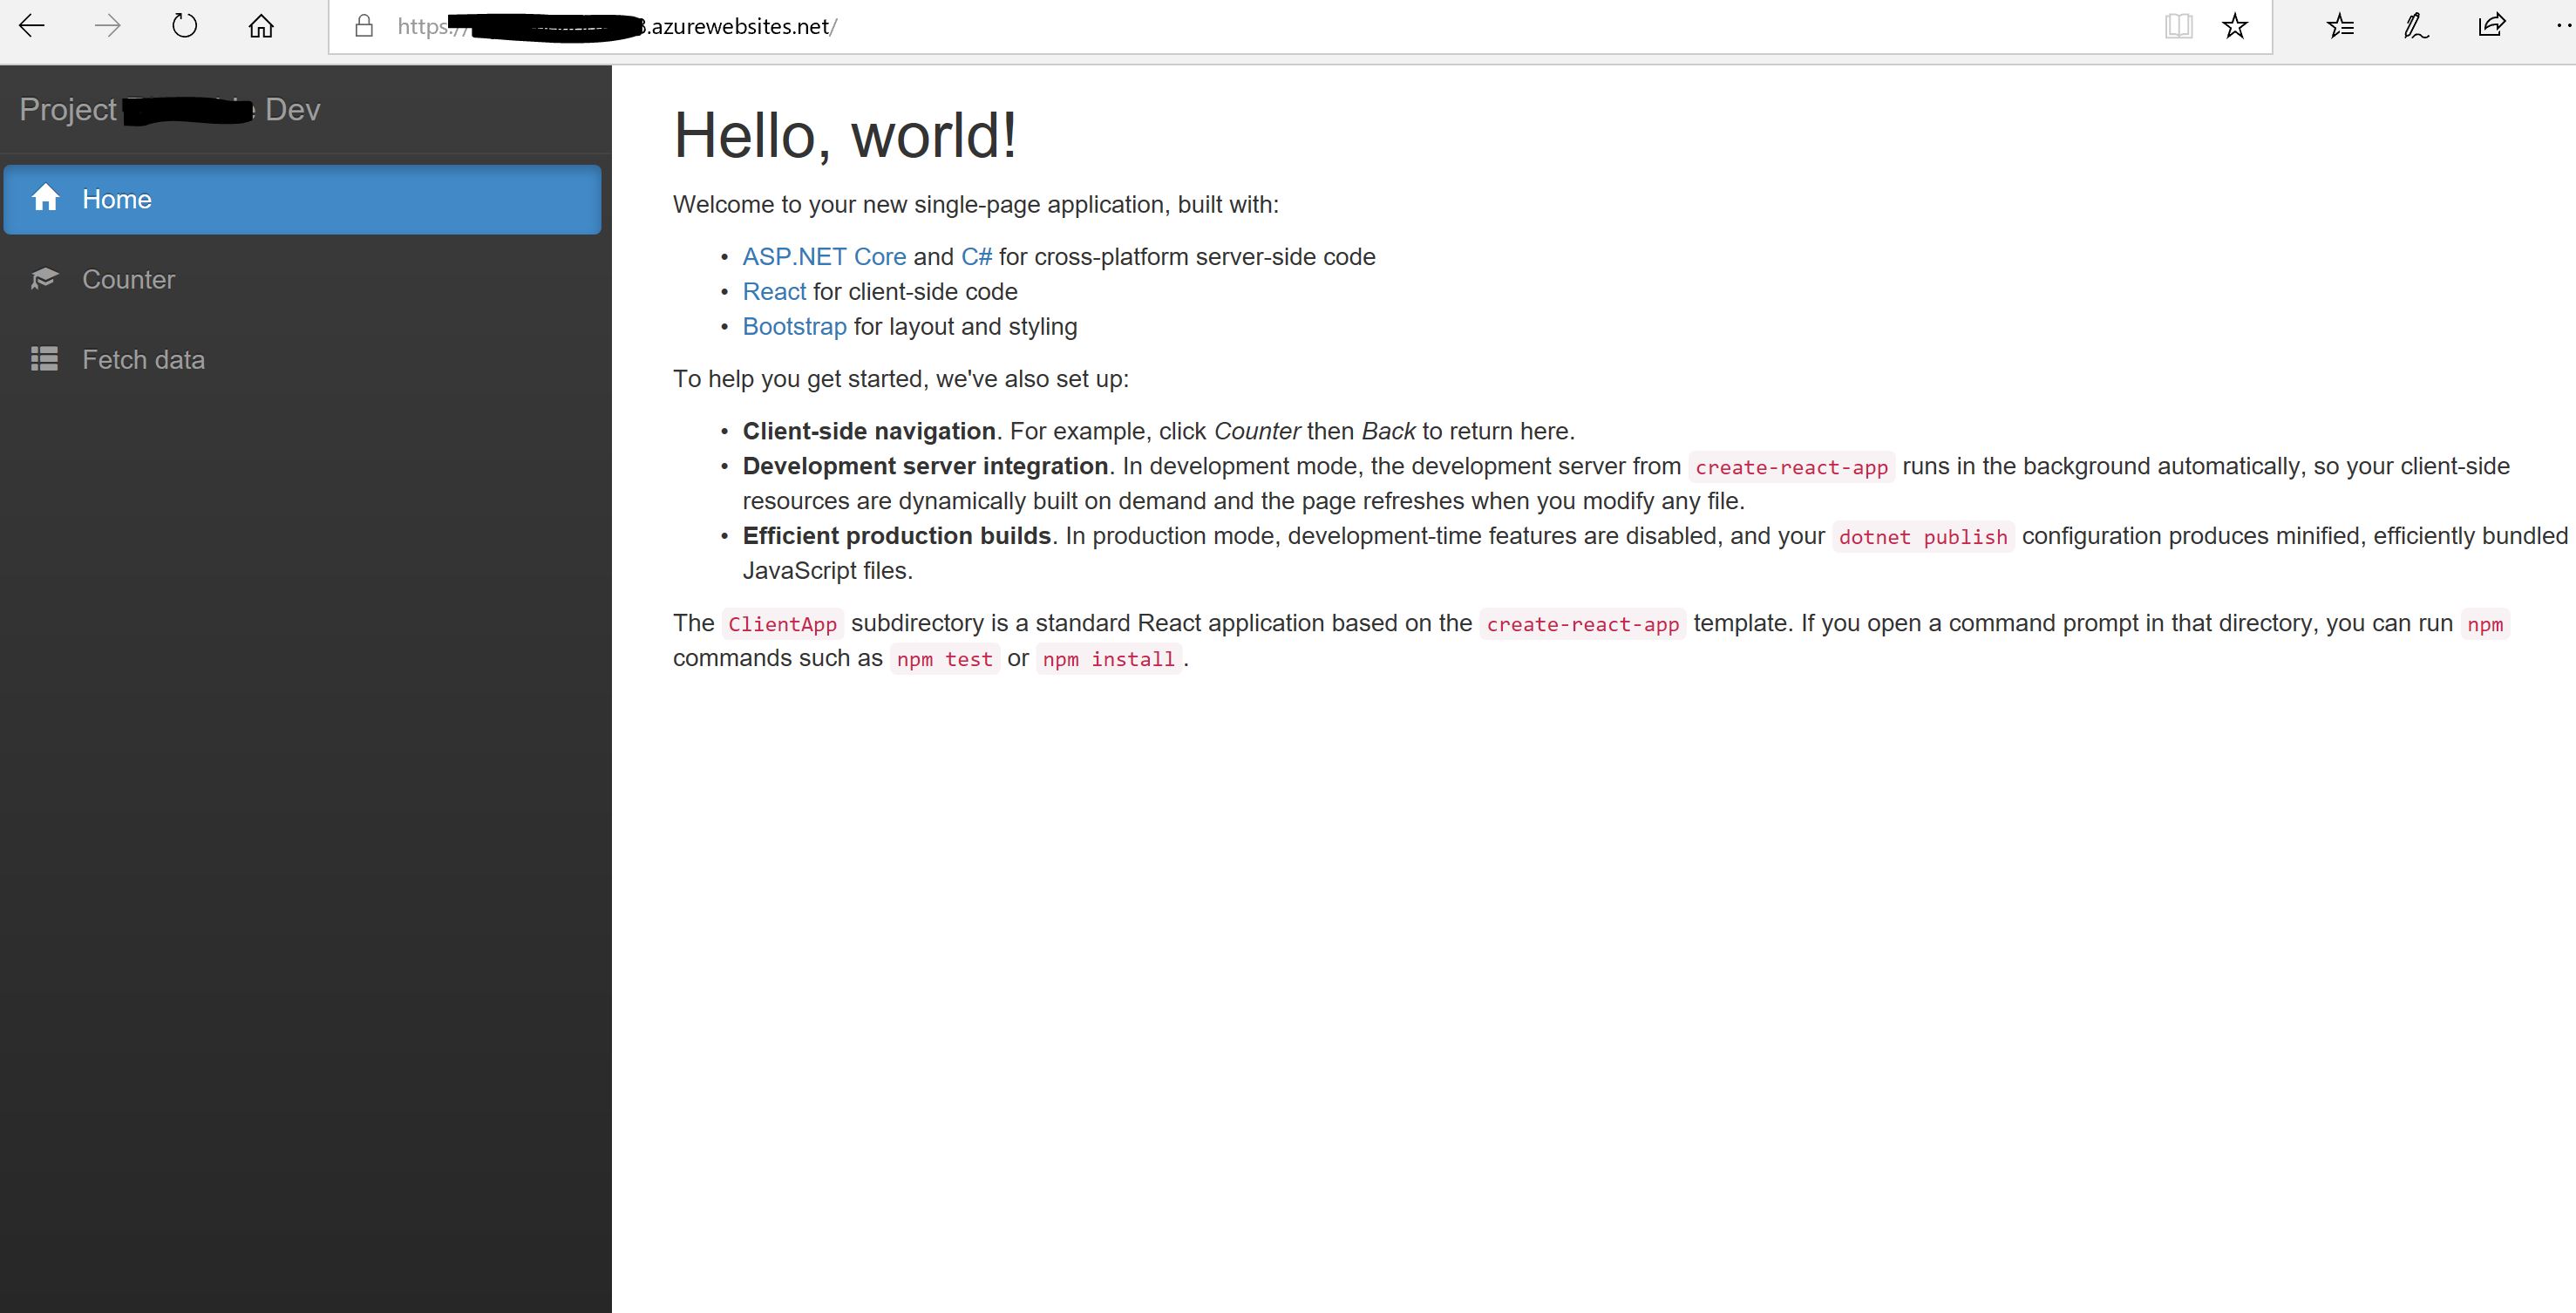
The end result should be a browser window opened with the new React application running on our local machine something like the following
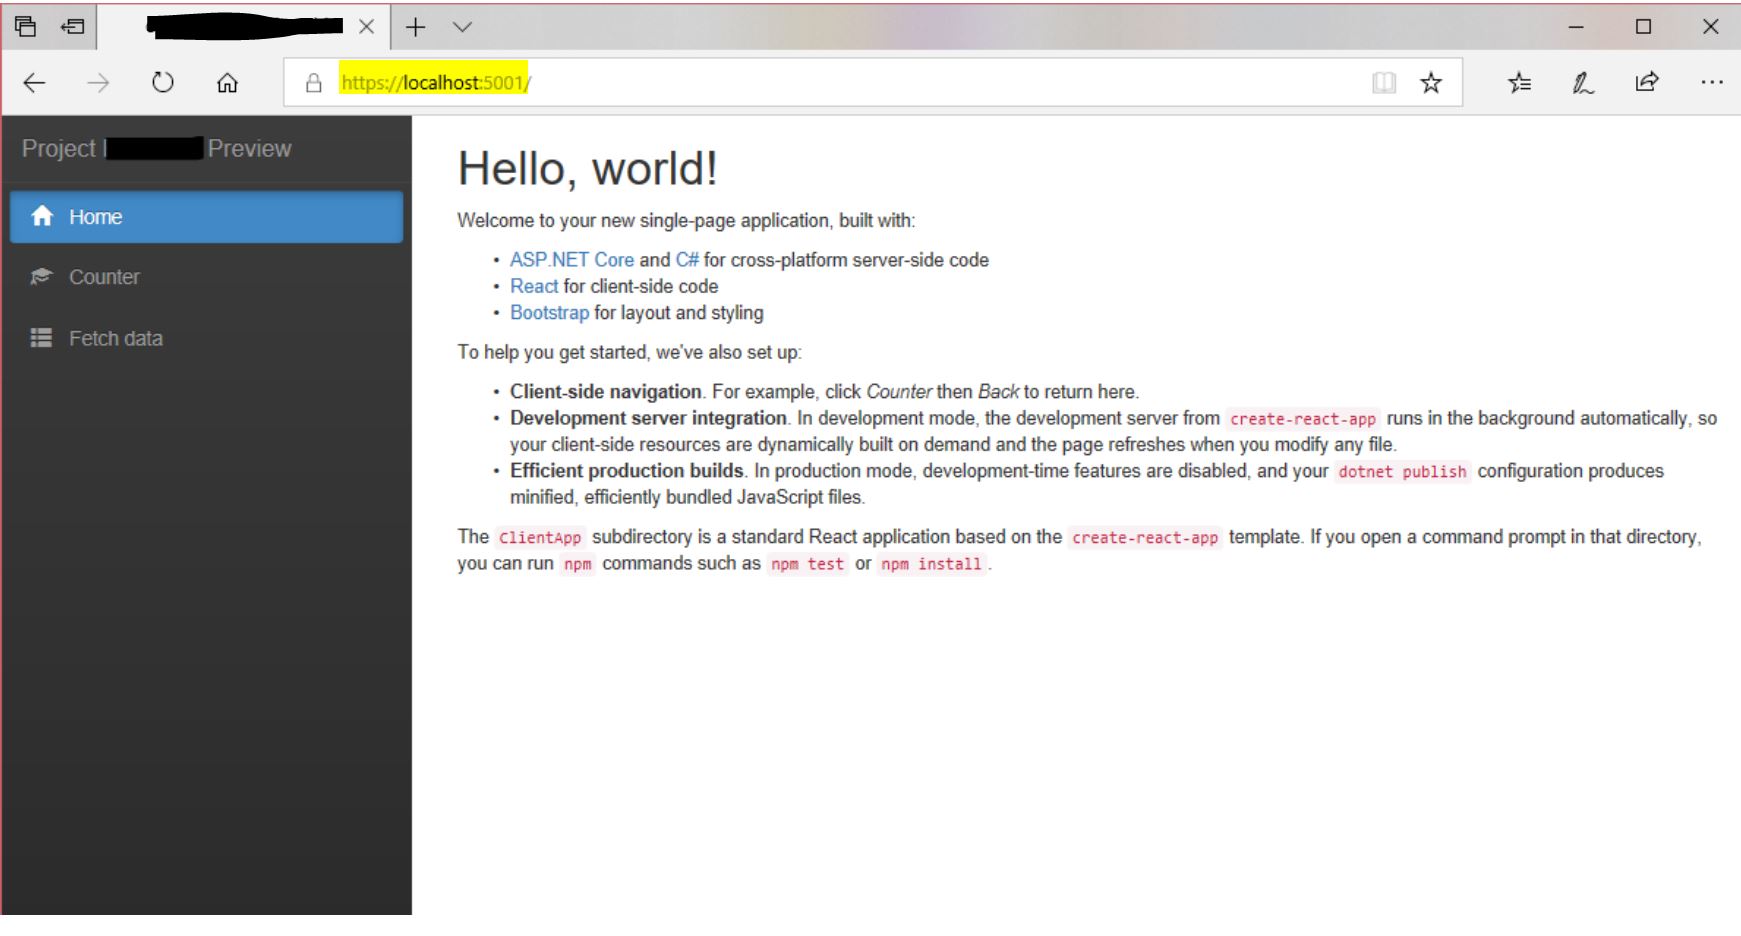
We can now commit this code to Git and push it to the master branch of our VSTS hosted remote git repository.
Step 2 Create the Azure App Service Web App
Now we need to log in to our existing Azure subscription. If you don’t have an Azure subscription you can get a free Azure subscription account to work with along with some credit to get started. We will use the wizard here for simplicity (hence the abudance of screenshots) although I’ve always been a fan of configuring my Azure components via Azure Powershell so that the process can be scripted and thus become auditible and repeatable and less prone to errors from omitting a setup step. For now though, let’s open a browser and go to https://portal.azure.com and log in with our administrative credentials.
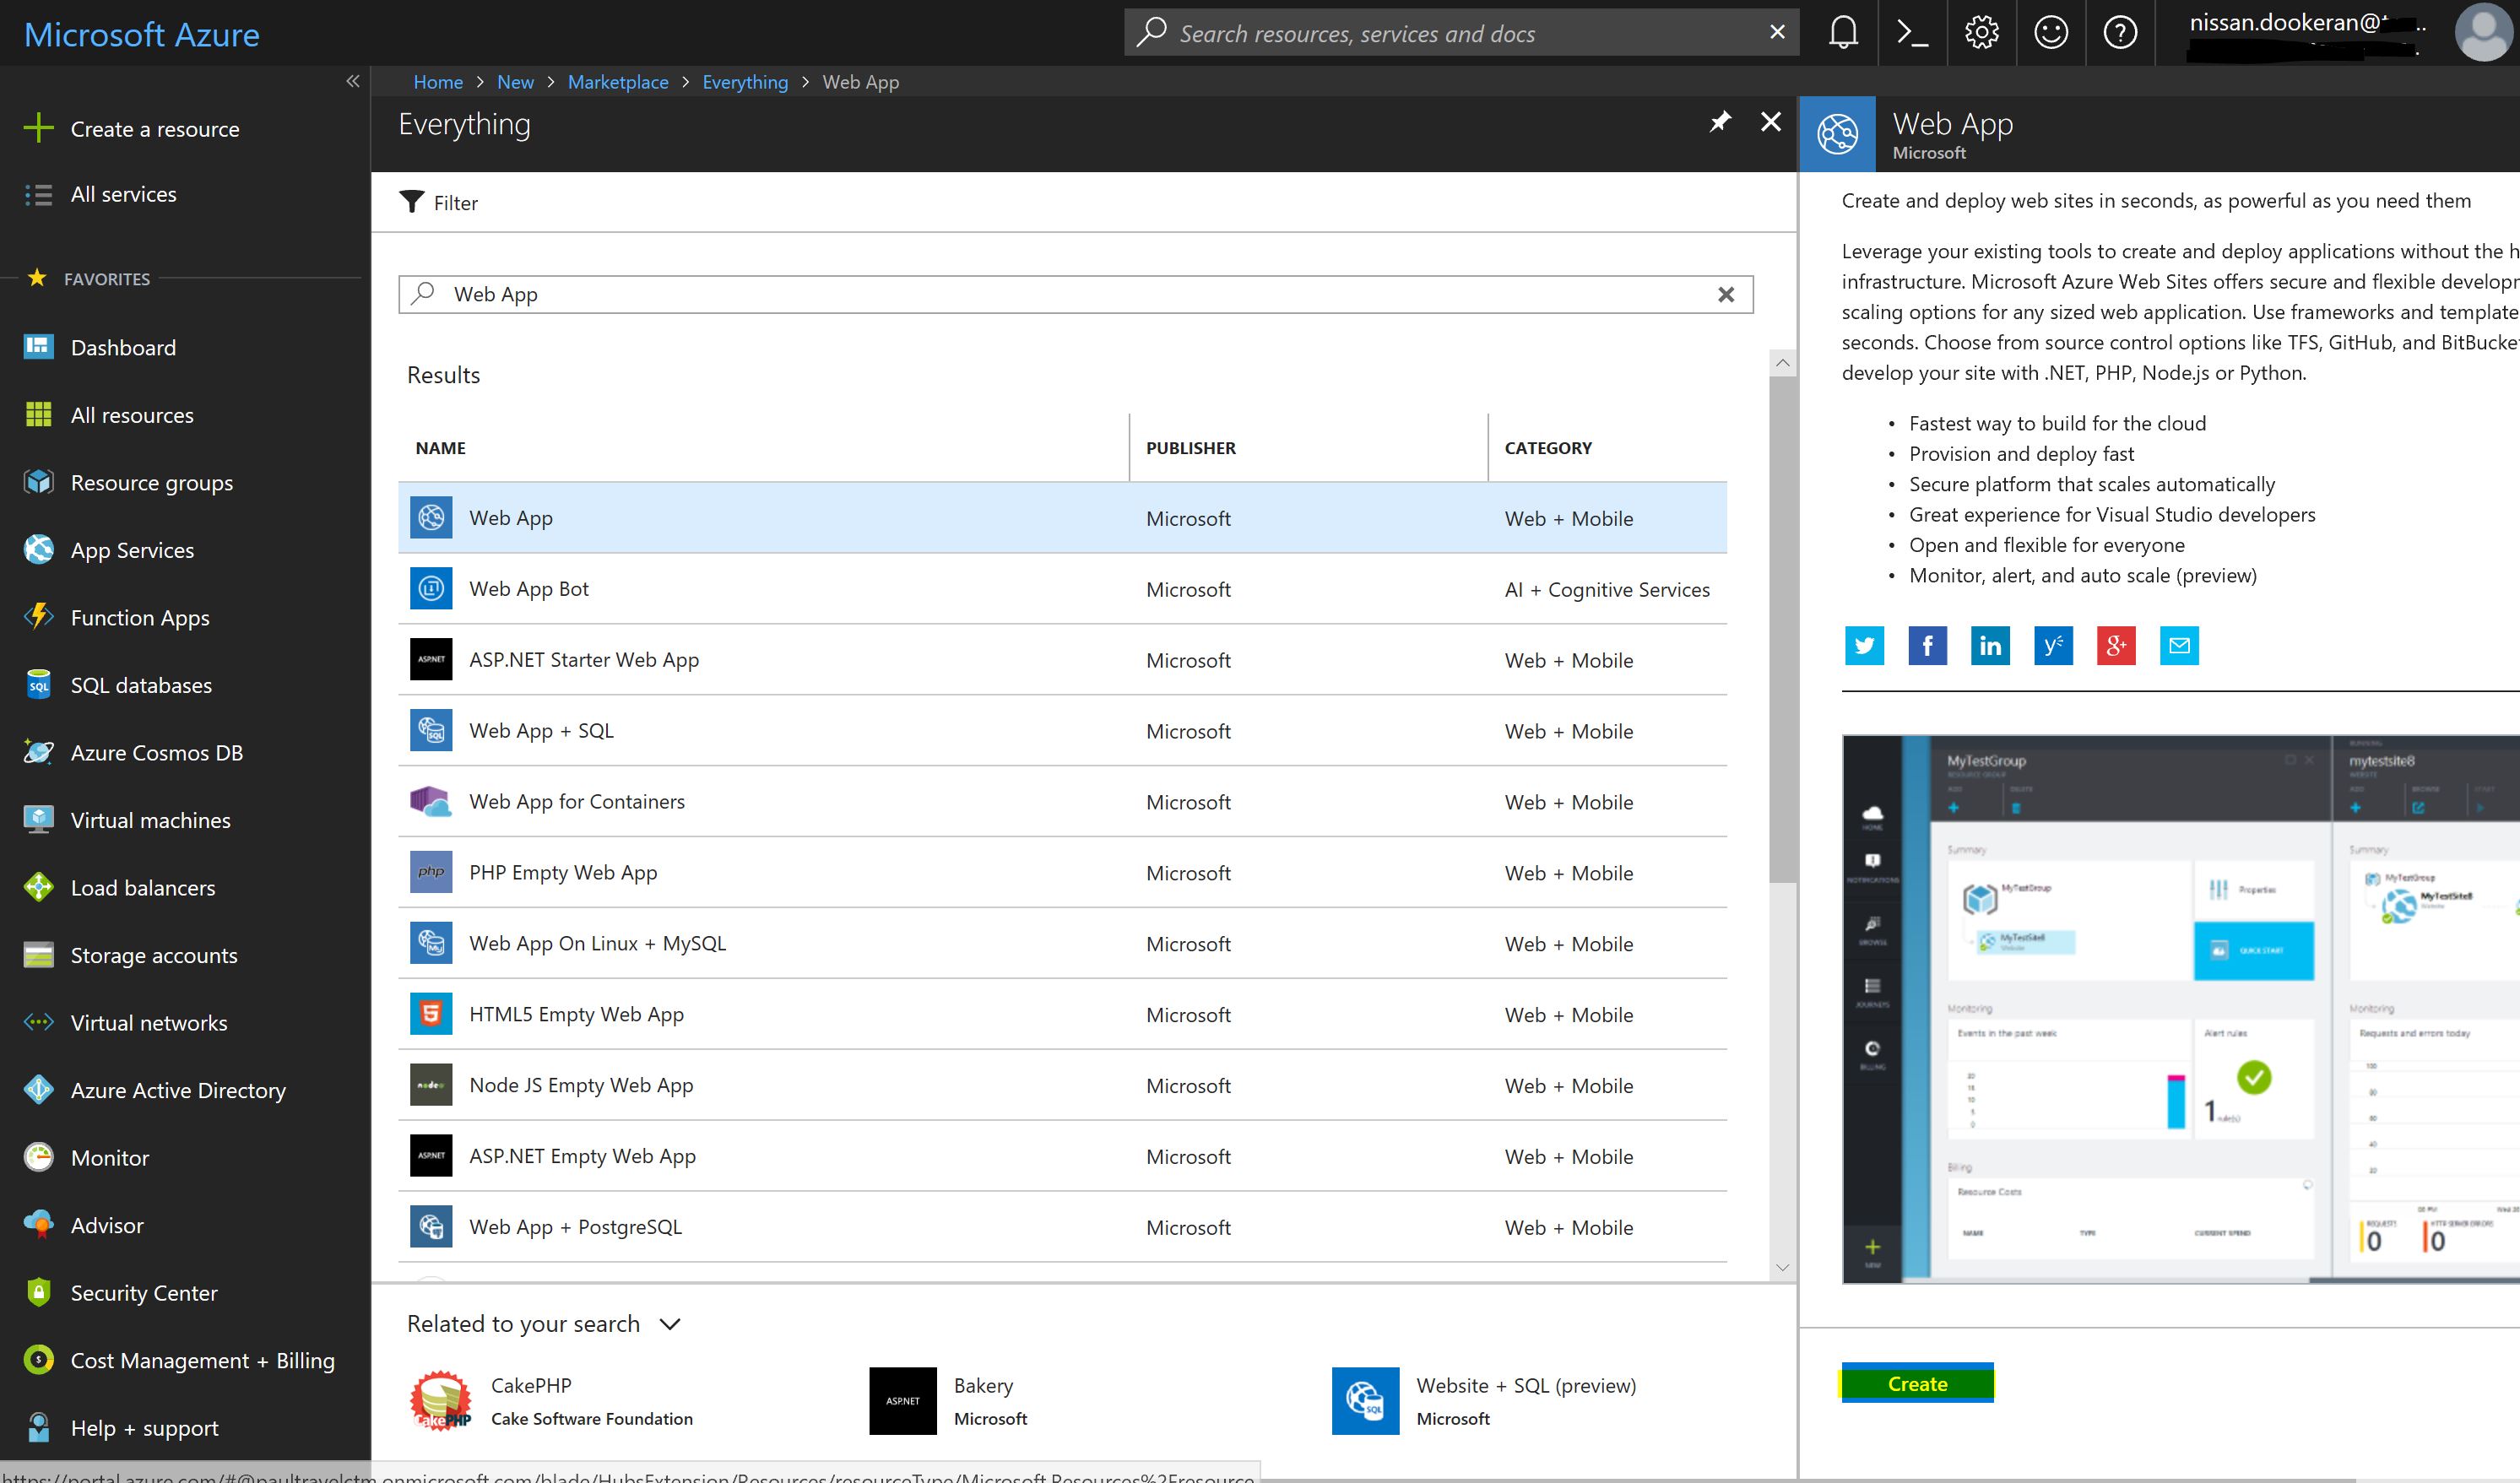
Click the + Create a resource and search for “Web App” which should return the following screen. Click “Web App” from Microsoft and click Create. From here you enter the various parameters including a unique name which will form part of the URL for the web application. You should turn on Application Insights since this will provide good telemetry data for your application once running.
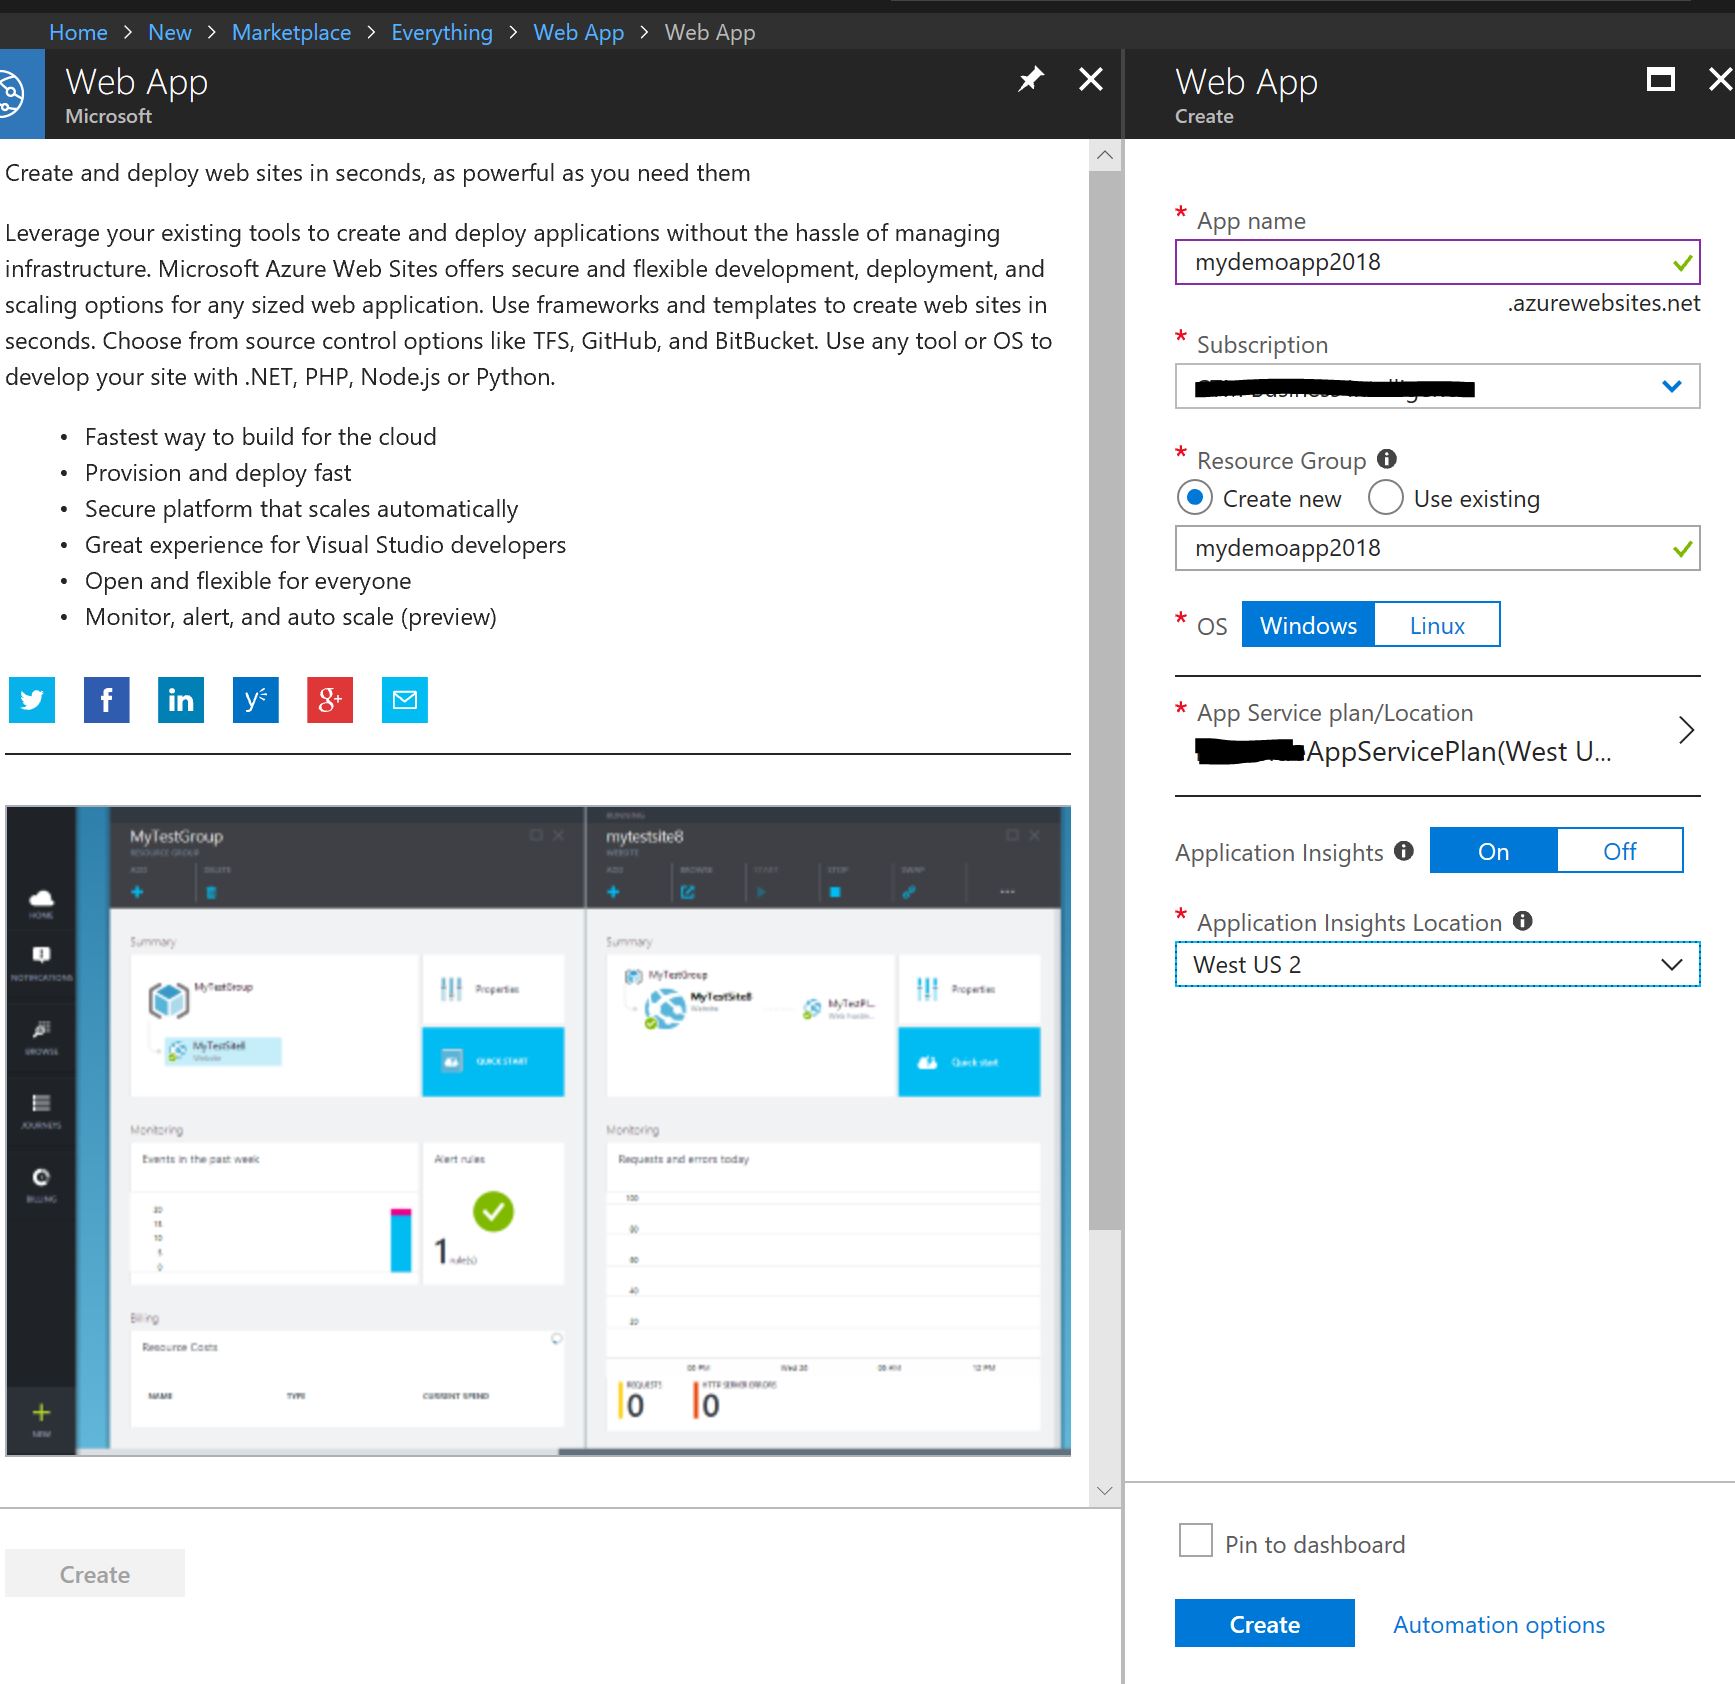
If you are just experimenting you can also create an App Service Plan on the Free Tier so you don’t consume any free credits (although this may affect your ability to do a full DevOps process outside the scope of this post later on)

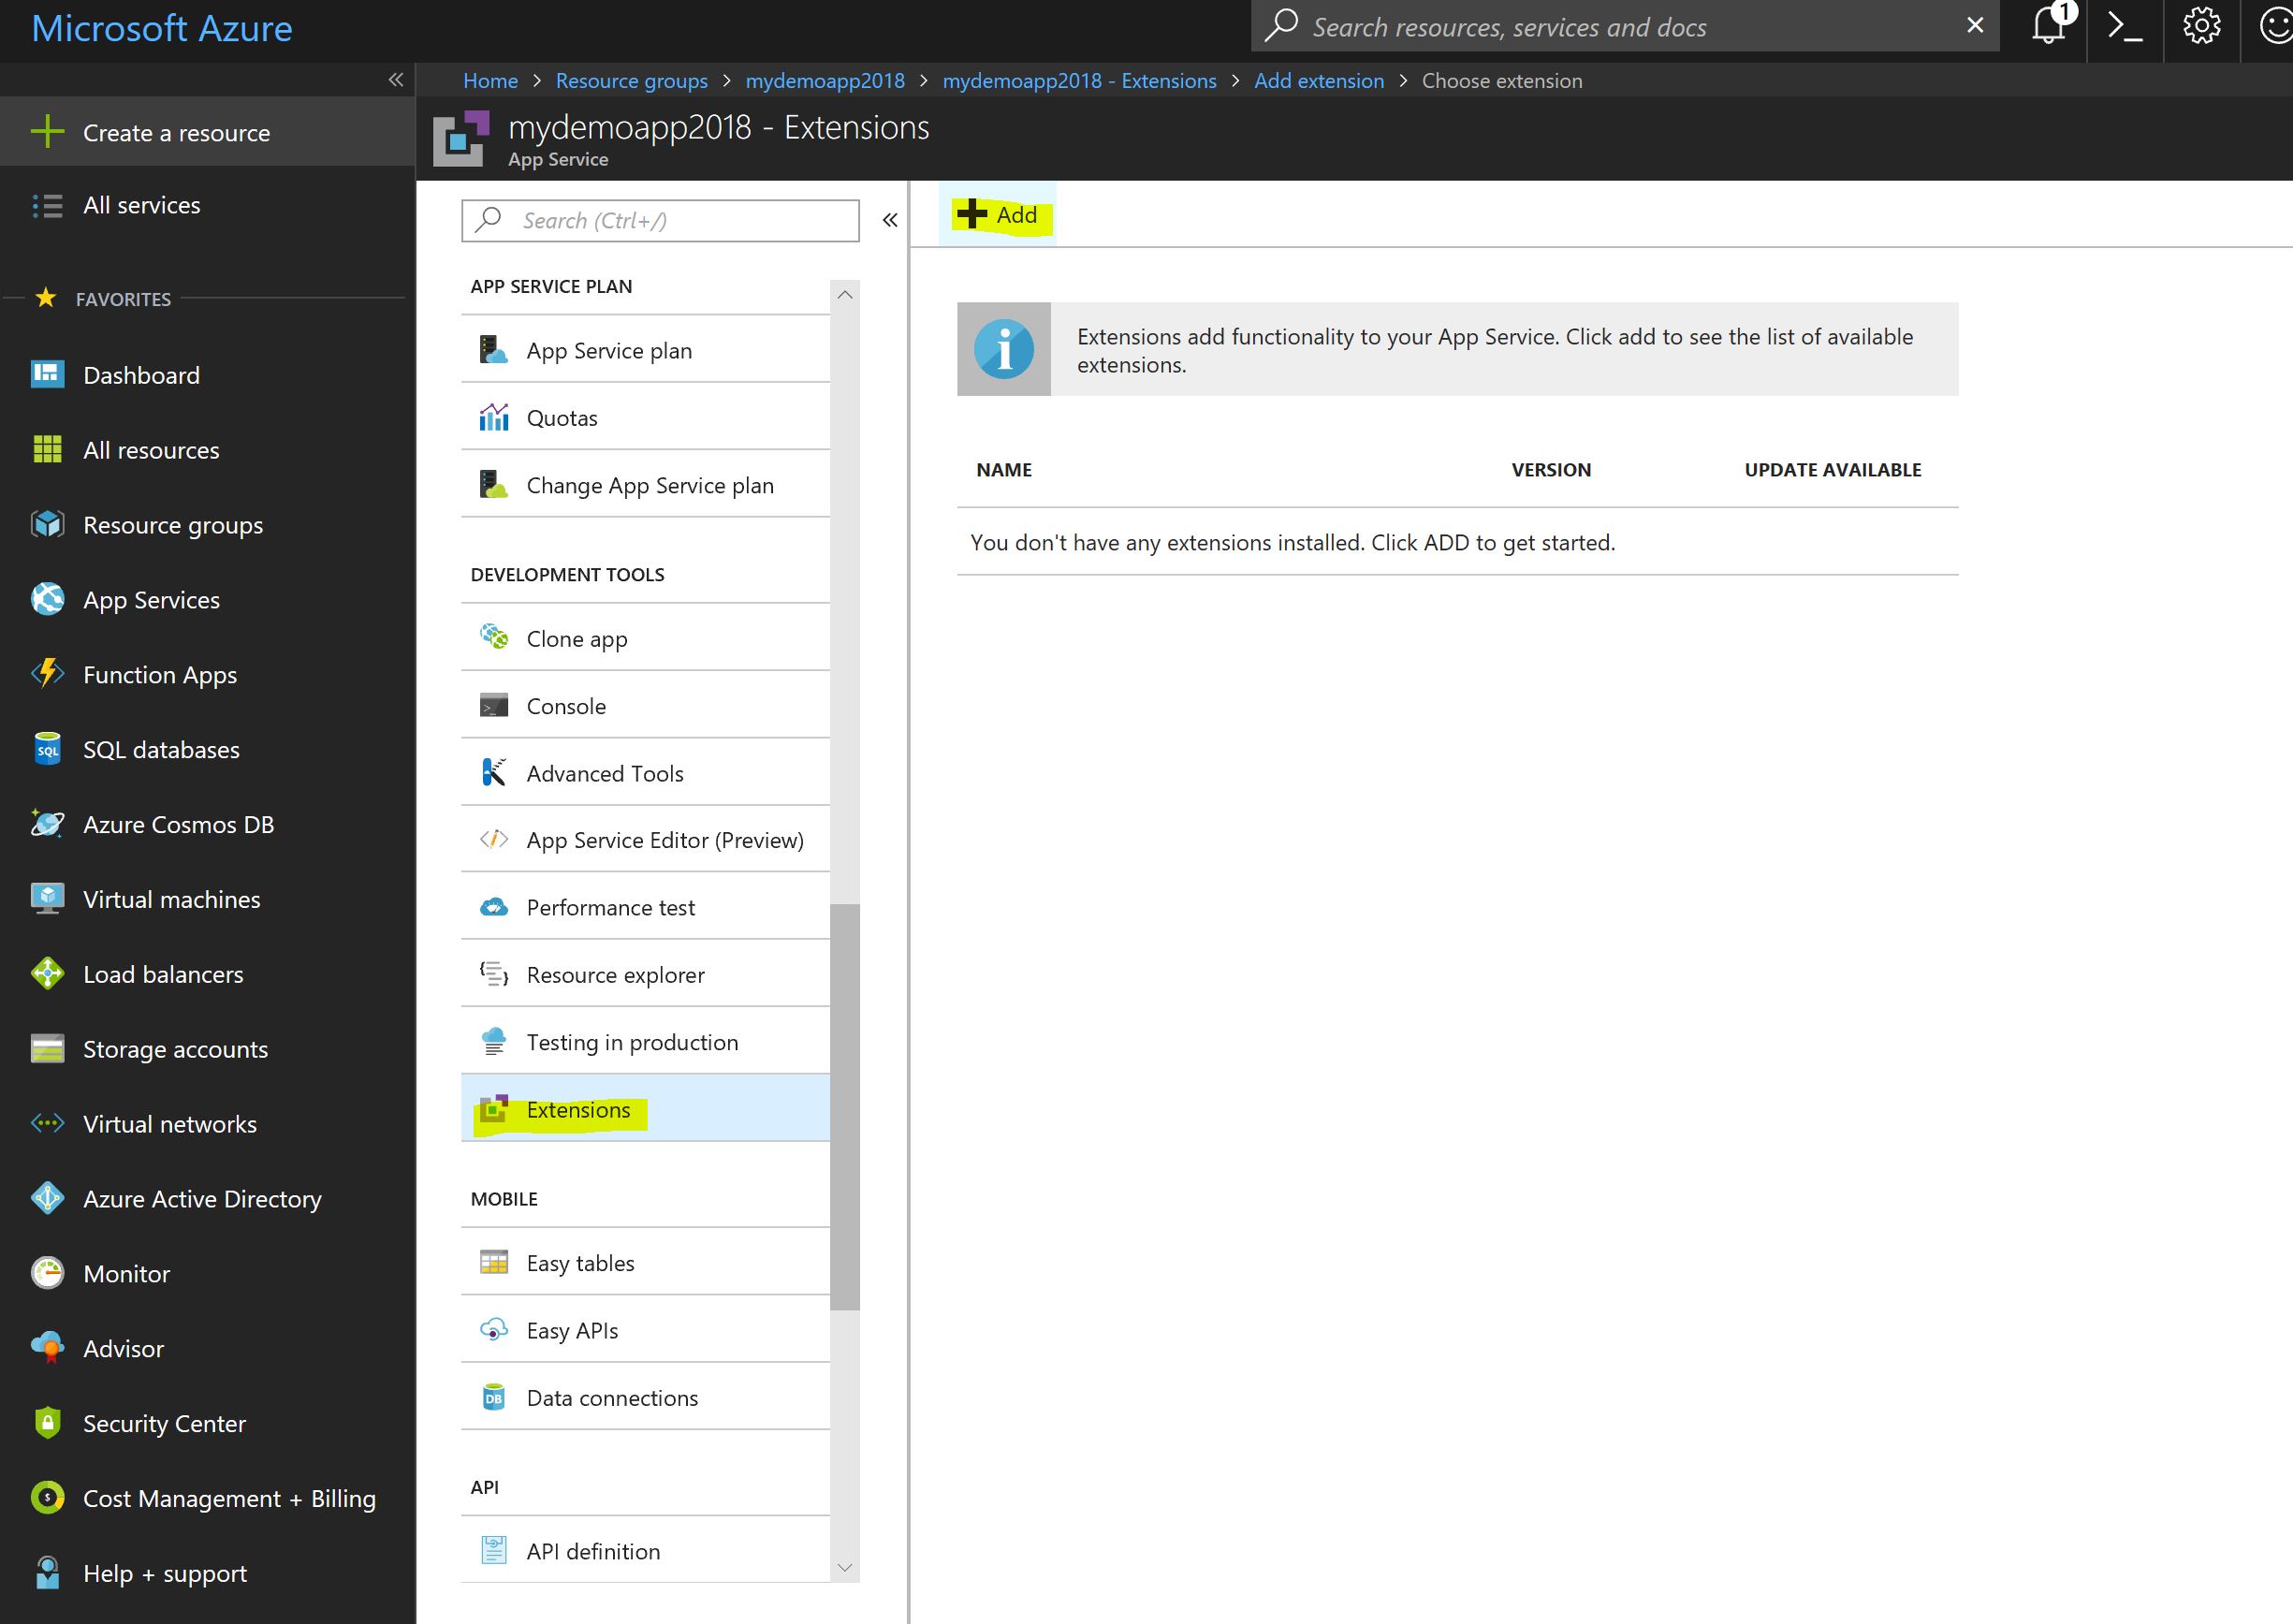
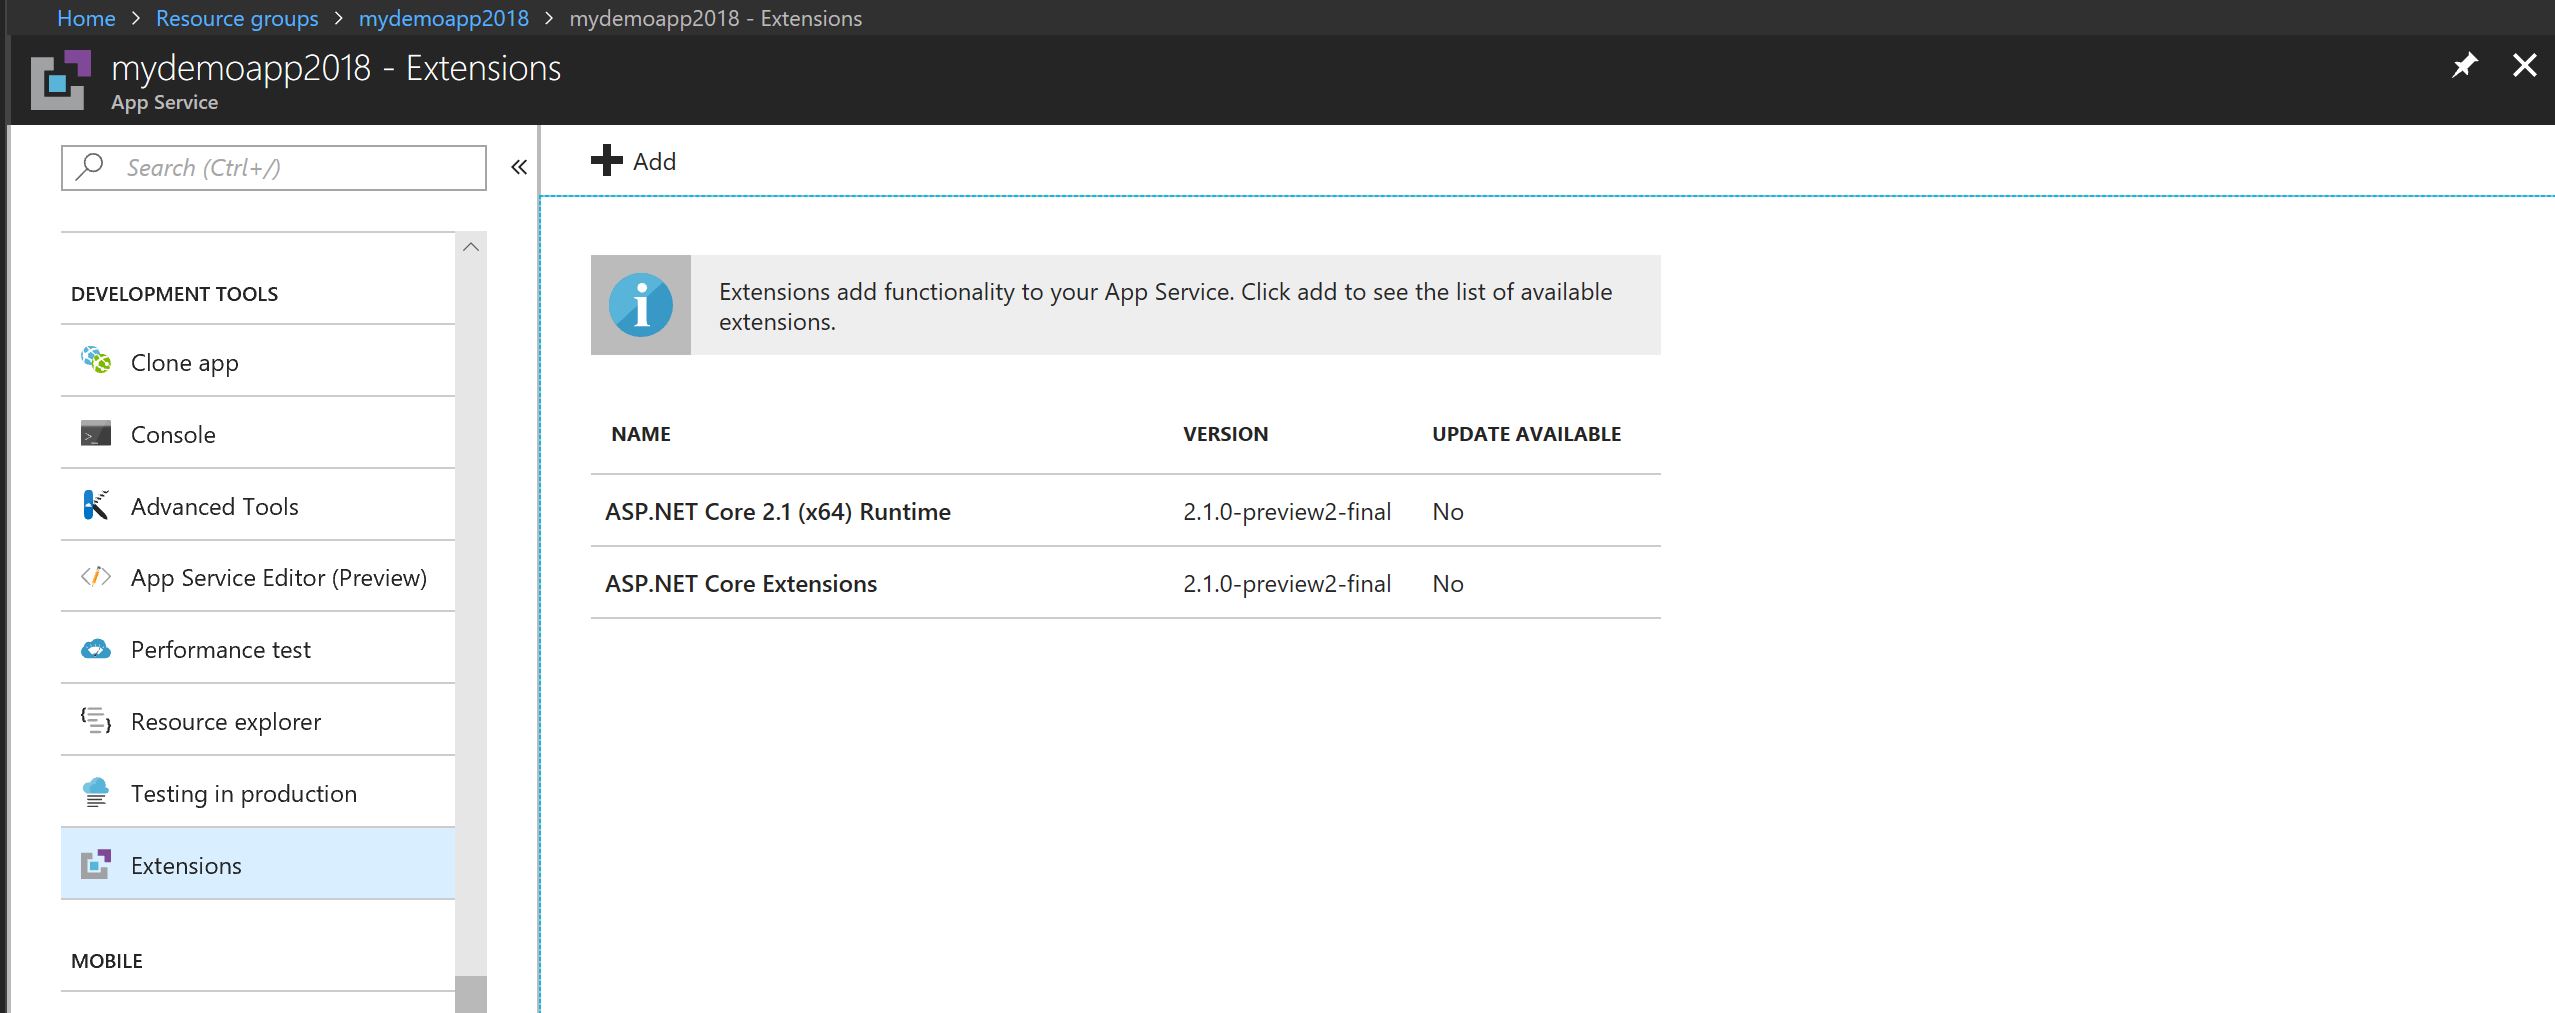
So now that is in place, when we click on the Resource Group in the portal we should see a new Web App and a new Application Insights resource setup.

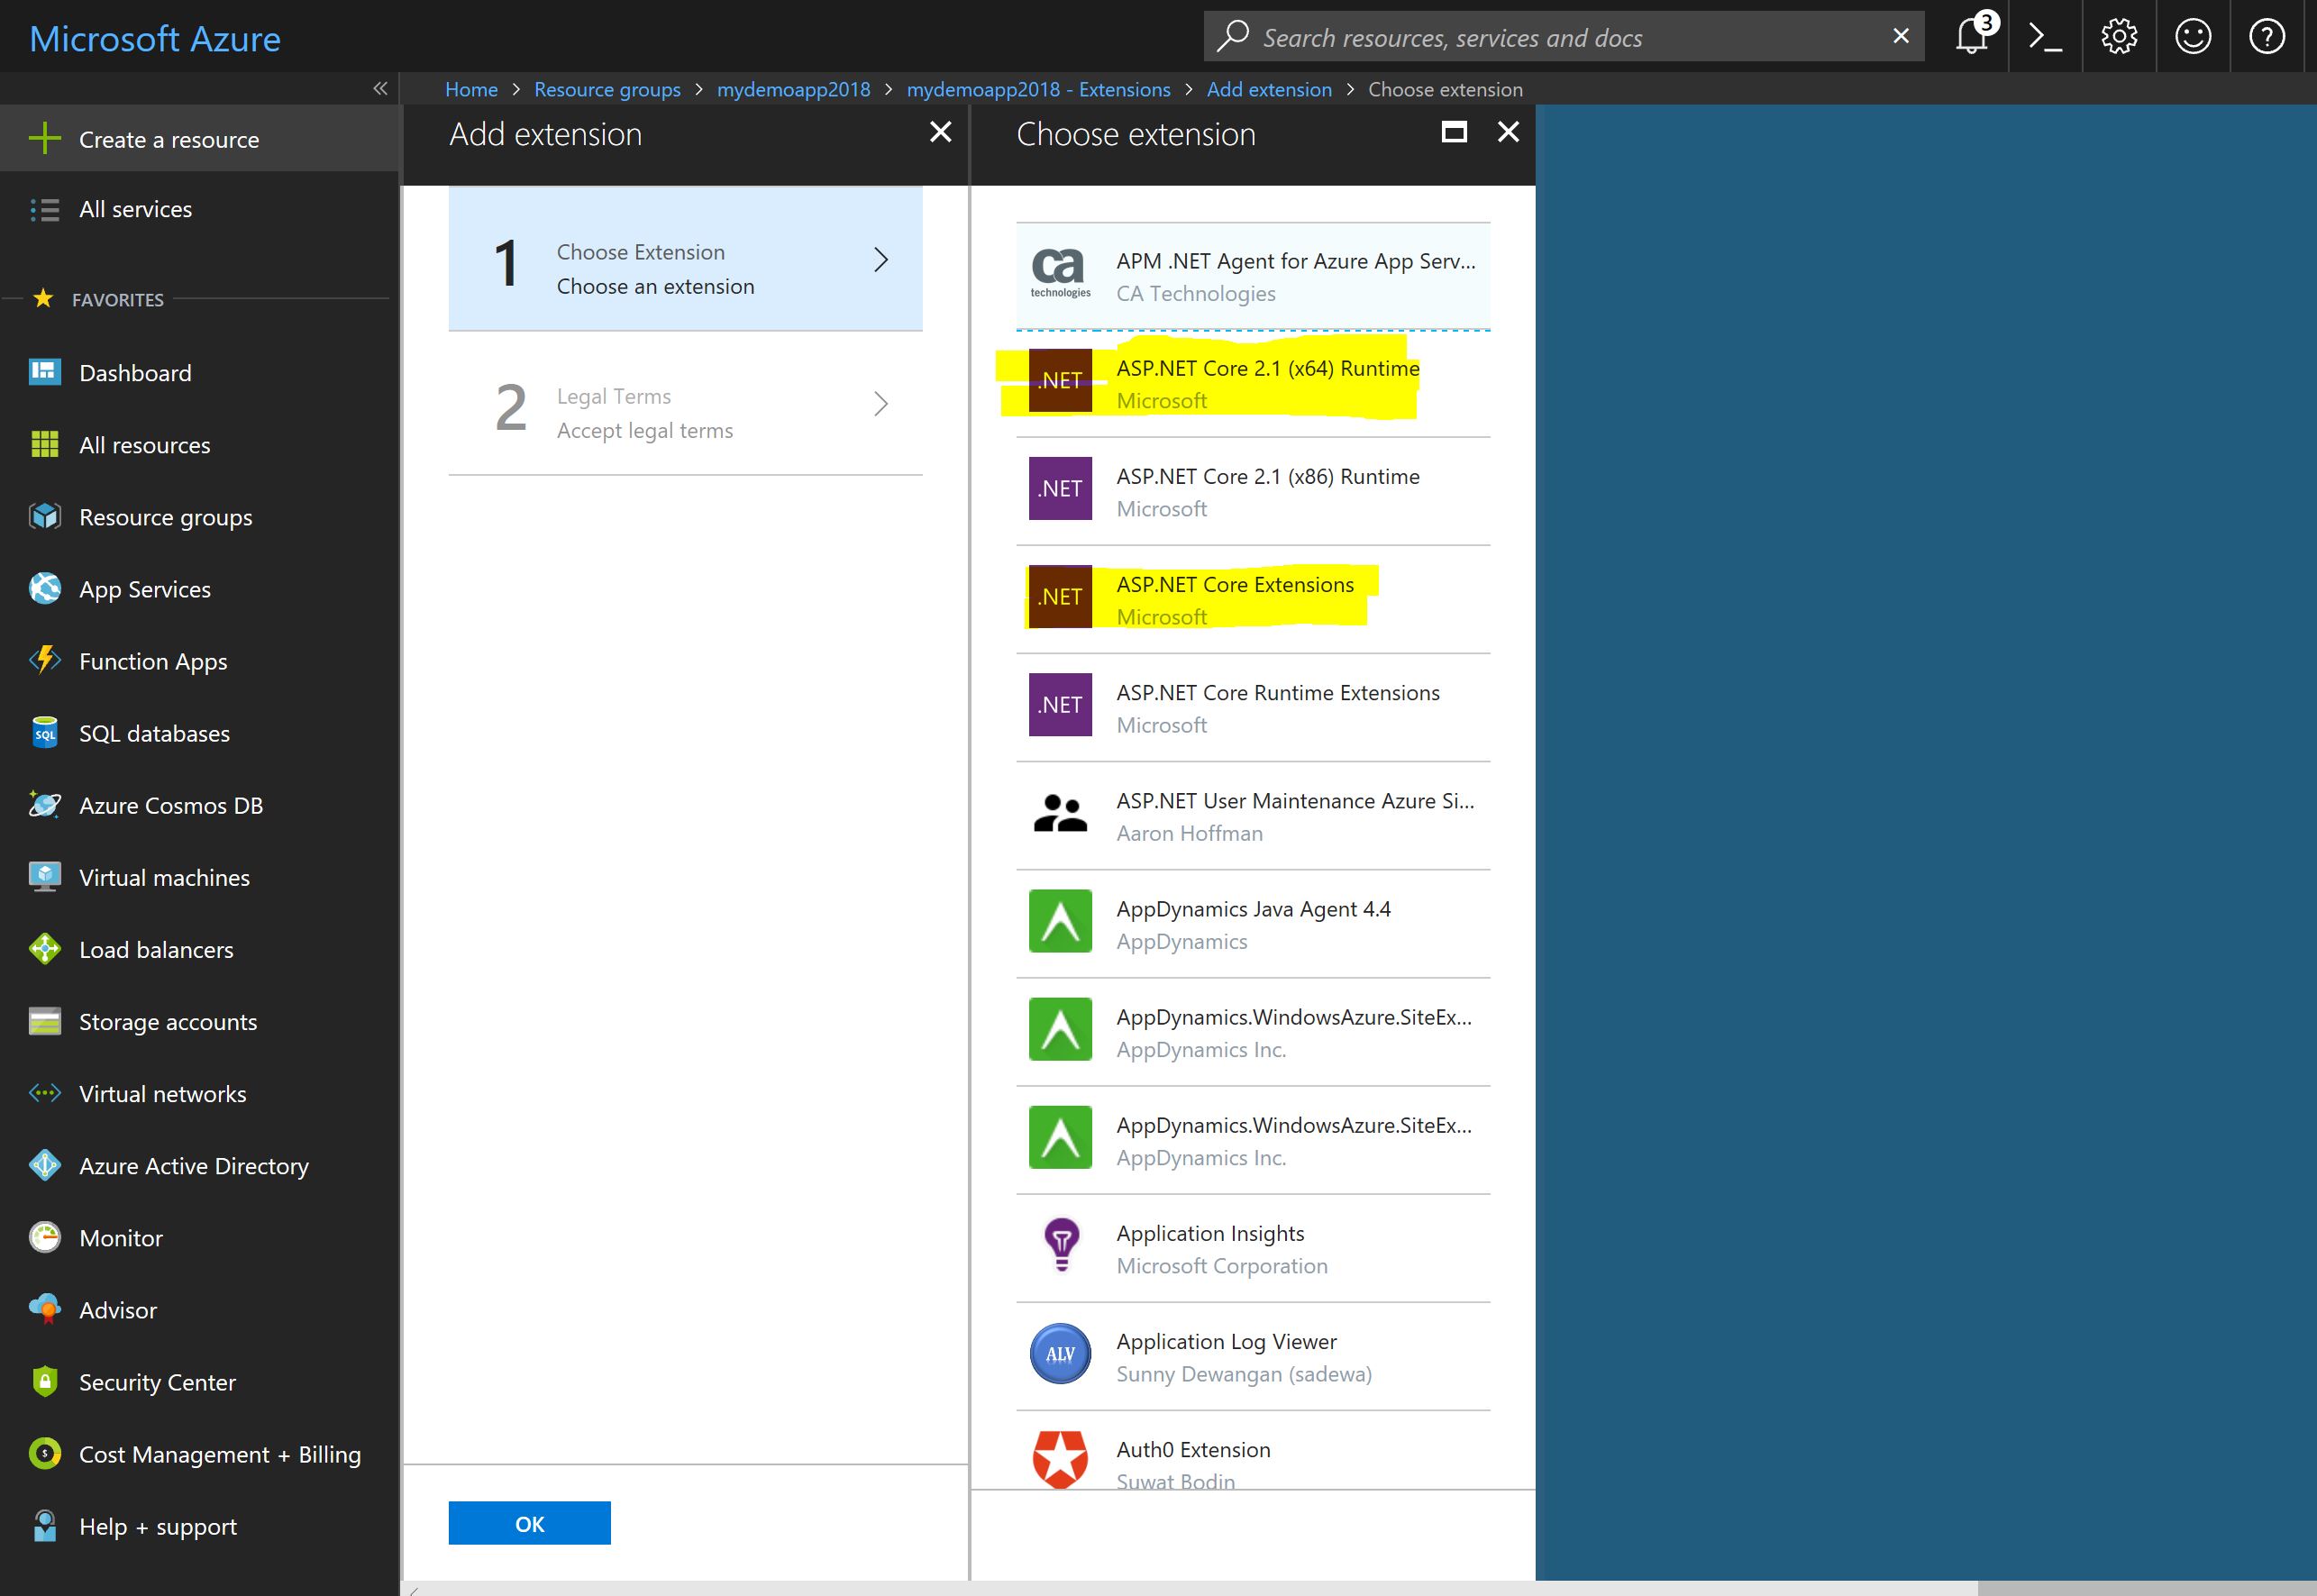
Clicking on the Web App we get the details of its deployment. Scrolling through the left menu column, we click on Extensions to reveal what site extensions are currently deployed, then click Add so we can add the ASP.Net Core Preview extensions highlighted in the screenshots below that we need for our deployed application to run properly. There’s actually an ASP.Net Blog blog post on these steps as well if the screenshots below don’t give sufficient detail for steps to execute (note although two site extensions are highlighted, you have to go thru the steps twice and add each one at a time).
Step 3 Setup the Build and Release Pipelines in Visual Studio Team Services
Here’s where I hit a bit of a learning curve since I never used VSTS build or release pipelines before, so take these steps as the words of a first timer who got thru rather than someone who knows the best practices.
Quite frankly the new Azure DevOps resource template is sure to lower the knowledge gap in future for getting this part going, once it’s a little more stable, since when I first tried this I used it and it failed in Azure with no intelligible error message (that’s bleeding edge for you). So for now, here’s the manual steps that I used to get a build and release process defined that will tie our VSTS code repository’s “master” branch to our public Azure Web App.
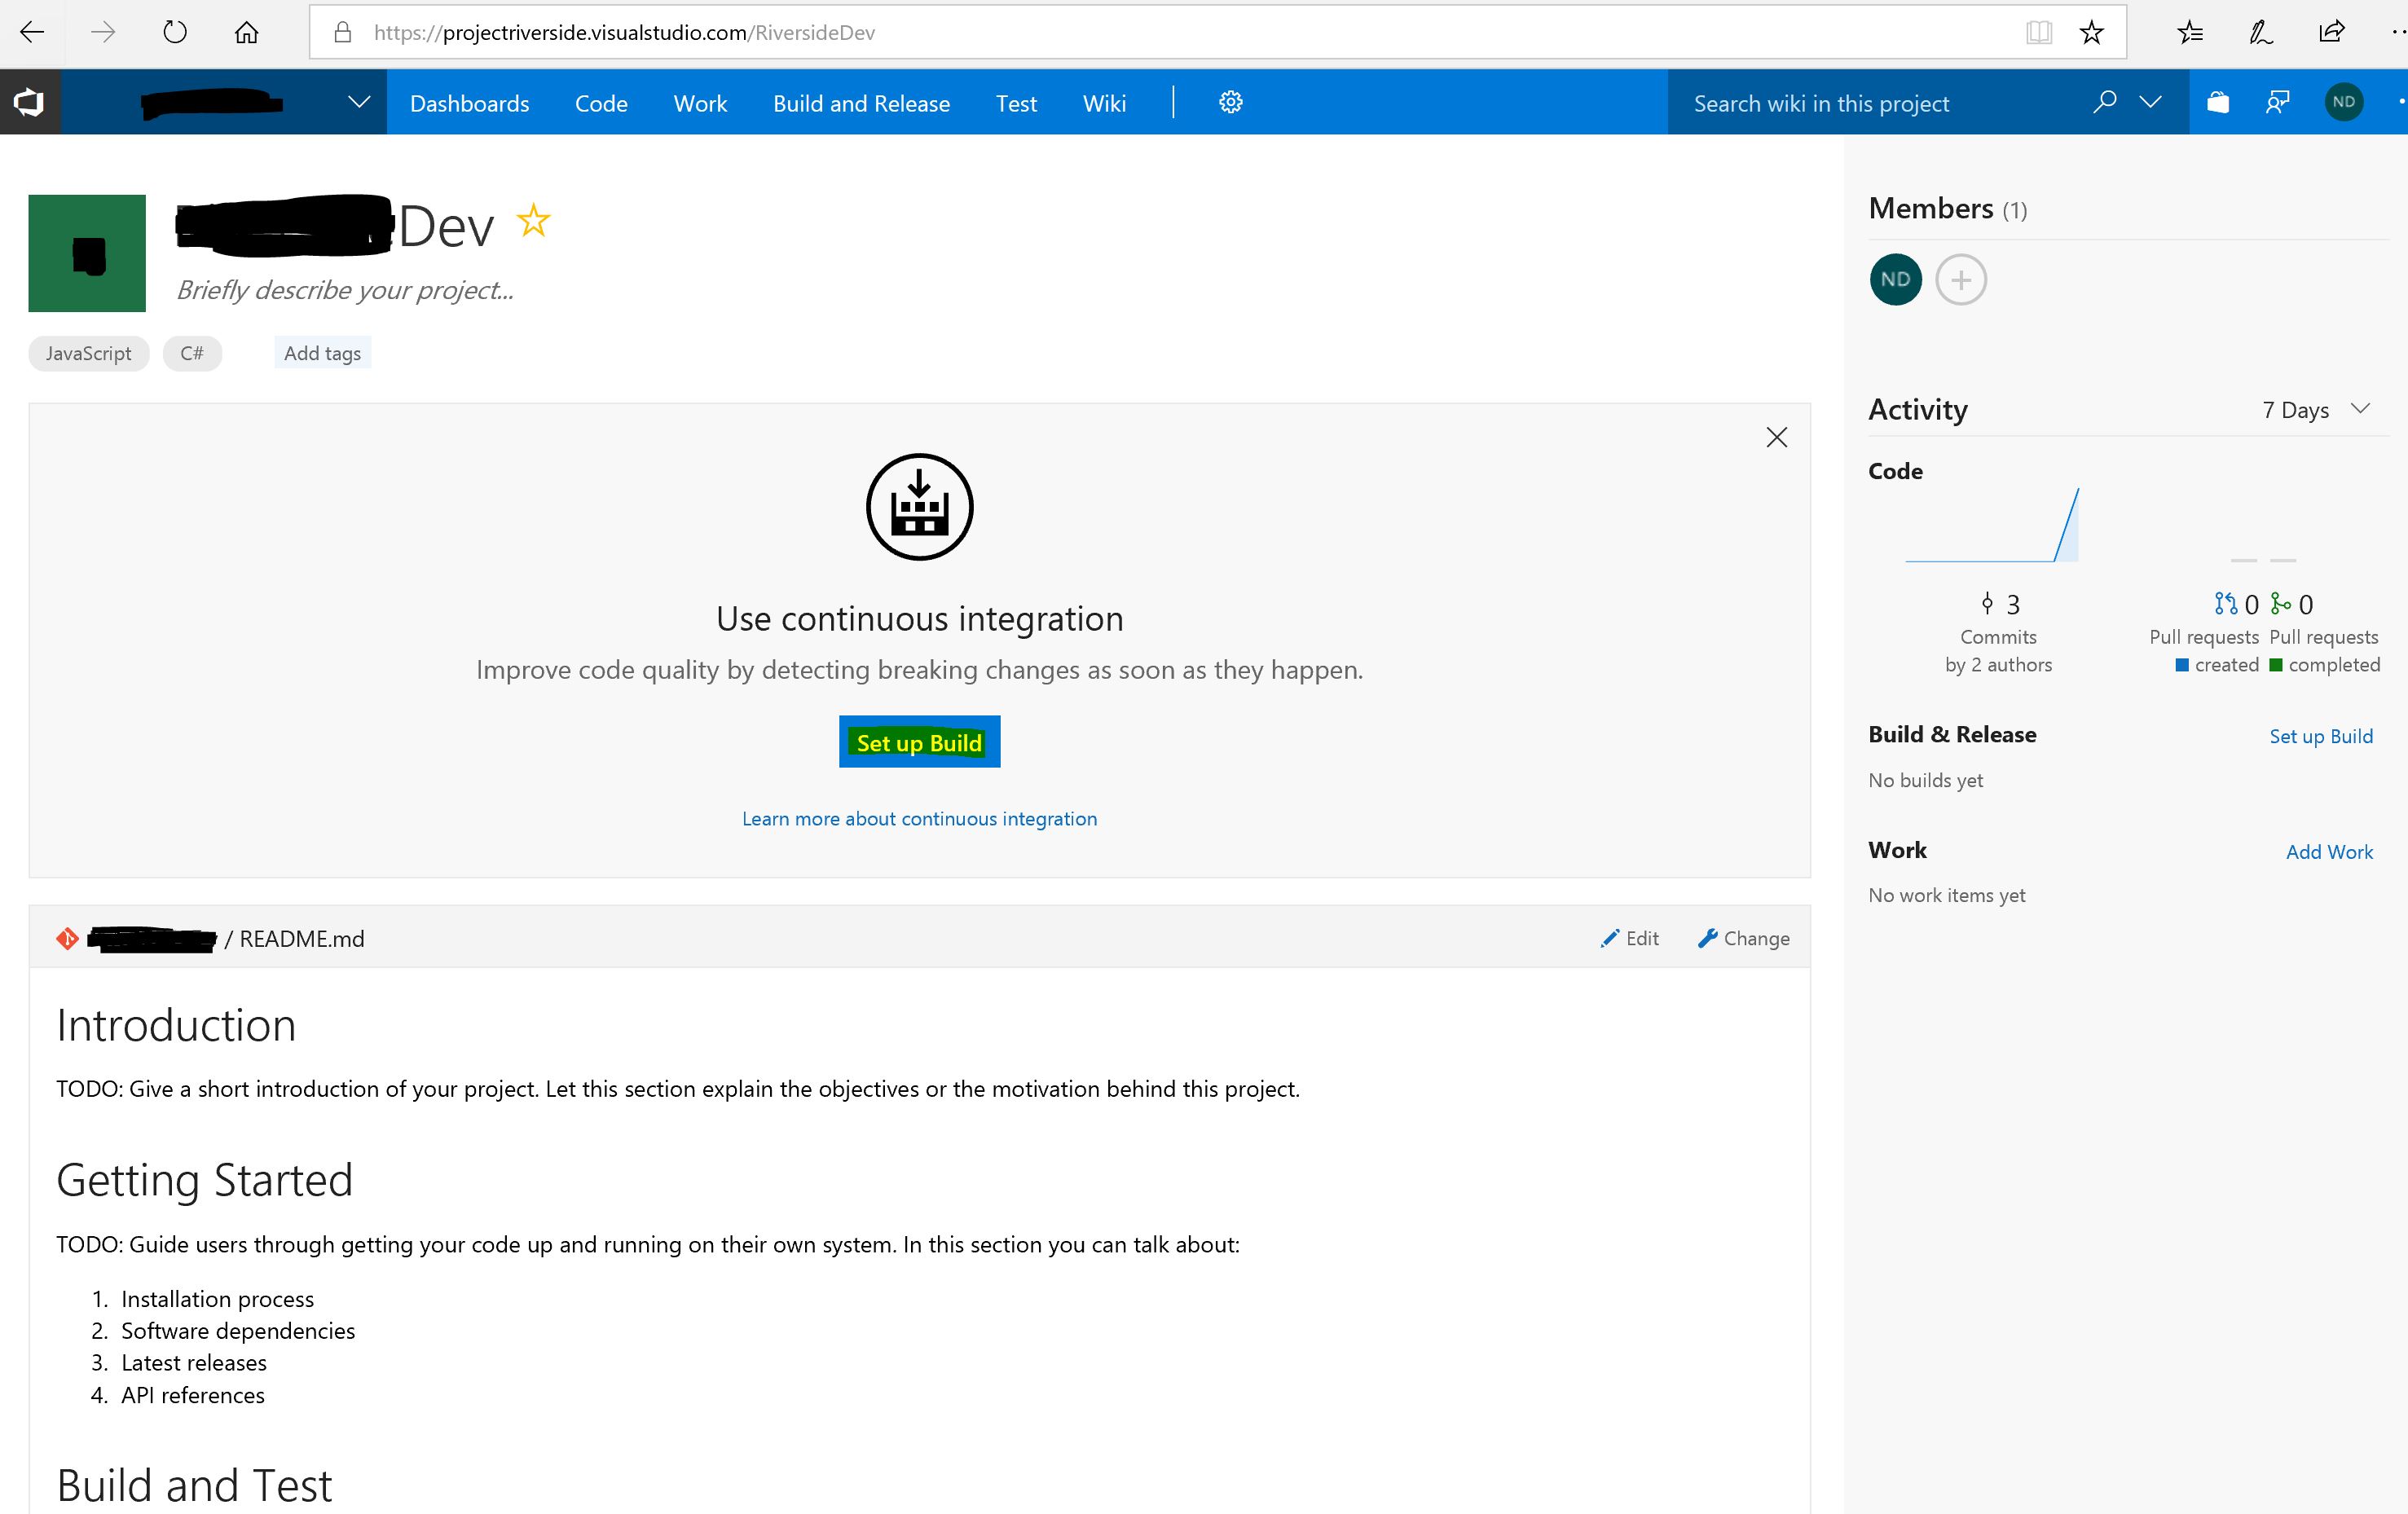
From the homepage for our project we can click the “Create a Build” button, or access it from the menu item “Build and Release”–>”Builds”
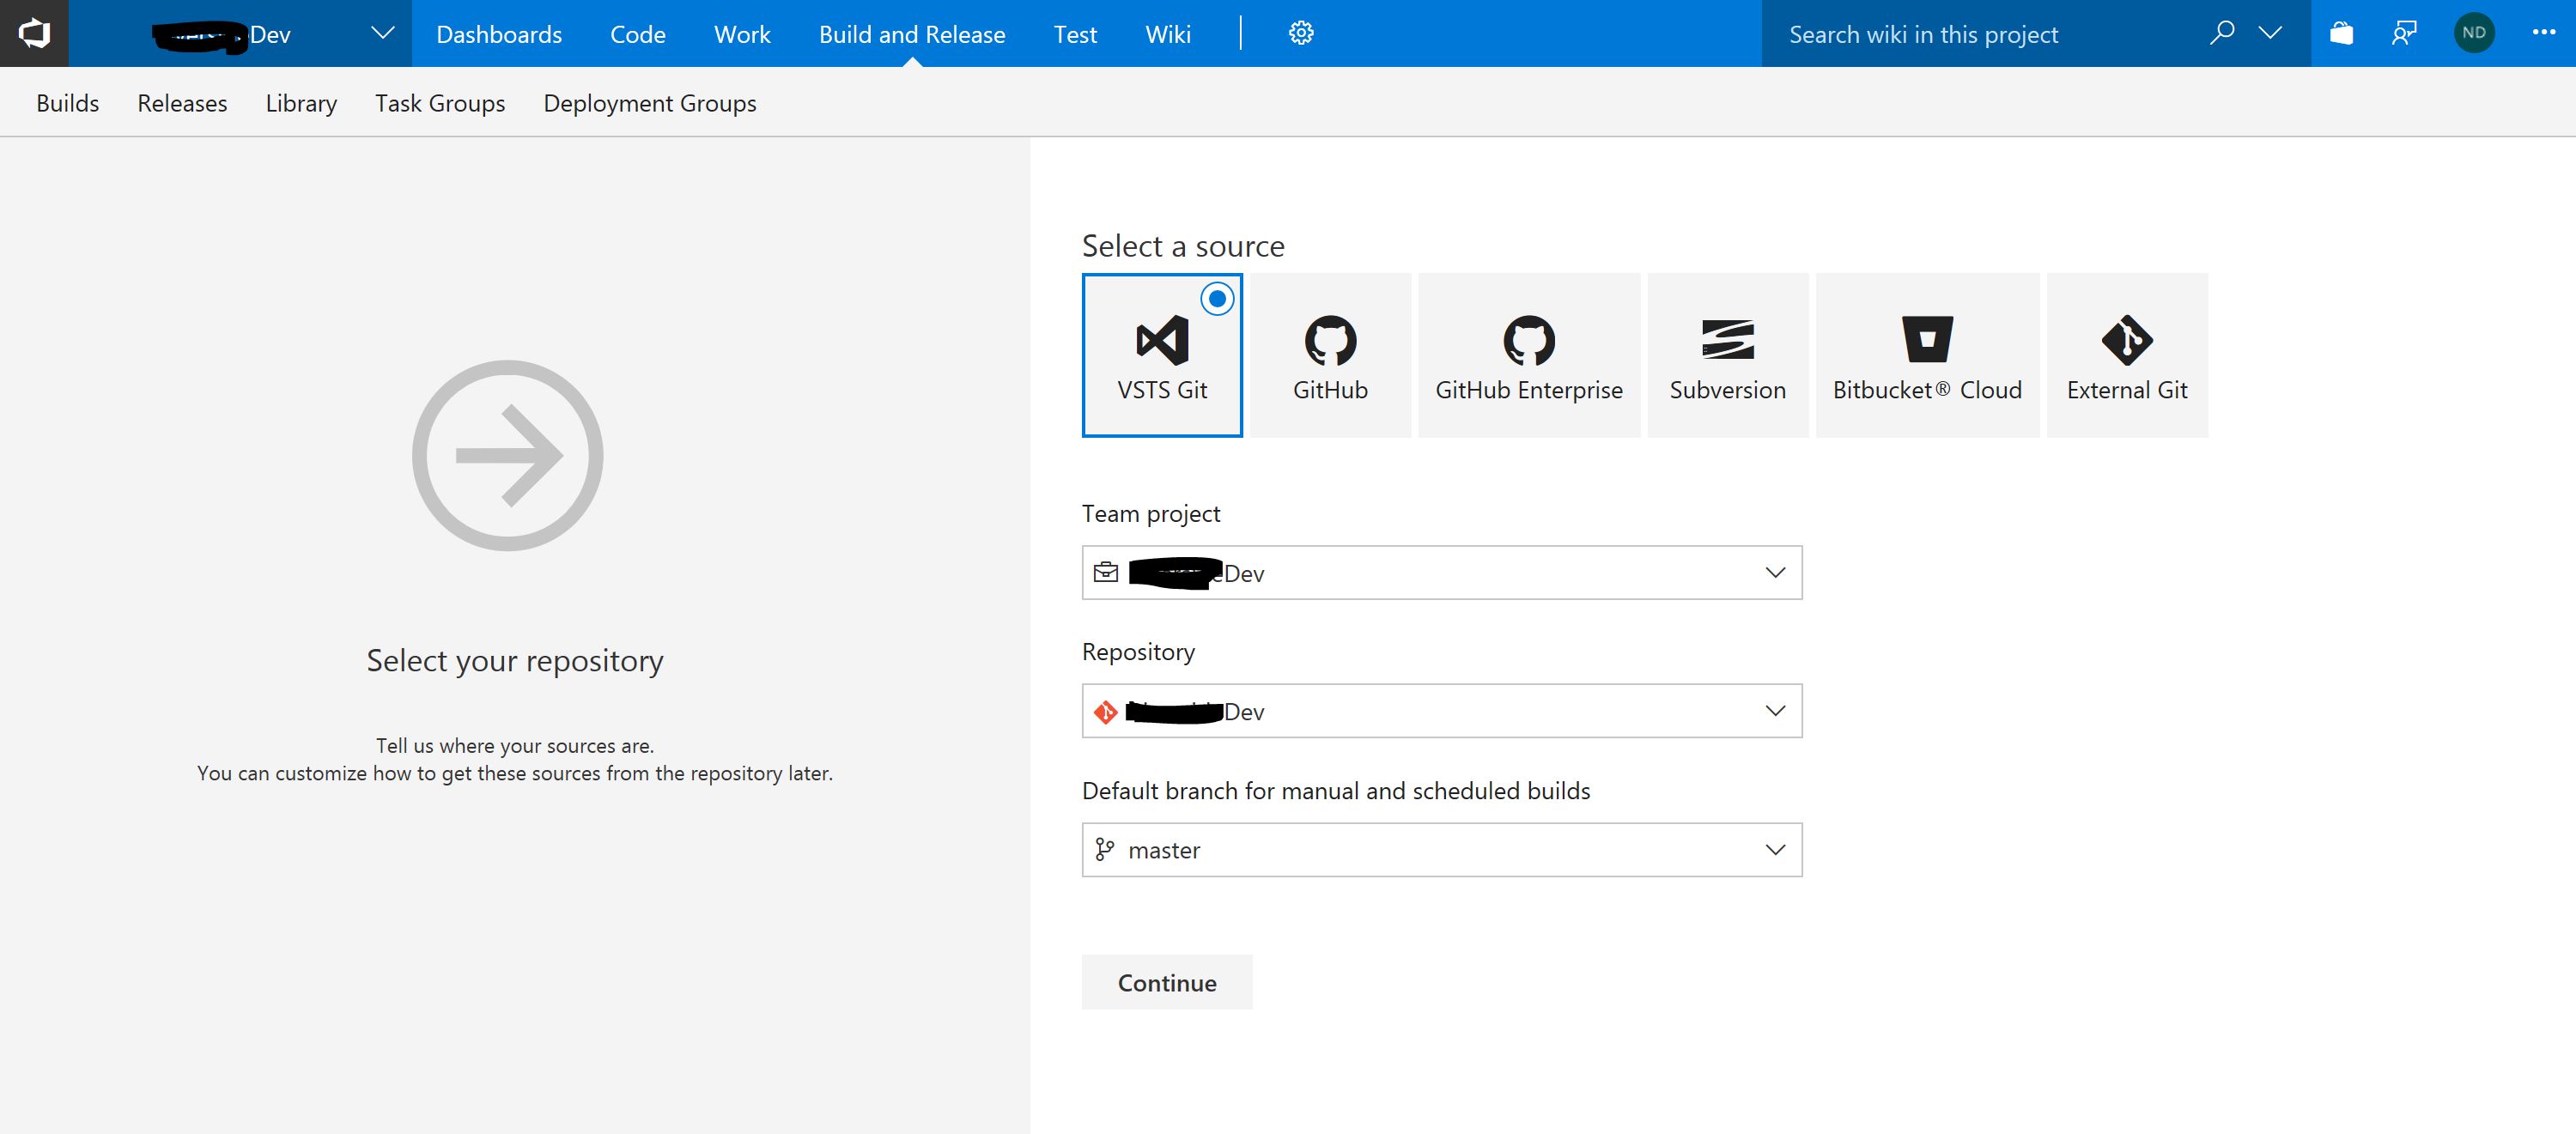
From here we select our source (VSTS), the Team Project and the Repository we’re building from, as well as the branch (in this case, the default master branch) and click Continue
Next we can select a template for the type of build we are creating. In this case, we select “Apply” for ASP.Net Core template

Now we need to tweak this template to cater for:
- we’re using a Preview of .NET Core 2.1.
- the uniqueness of the React template’s architecture which is both a pure React-driven project front end and a .NET Core WebAPI driven project for the backend.
First we click the + to add a new Build step.
Look for “.NET Core Tool Installer” and click “Add”. Drag this step to the top of the build order so that it is the first step of the build.
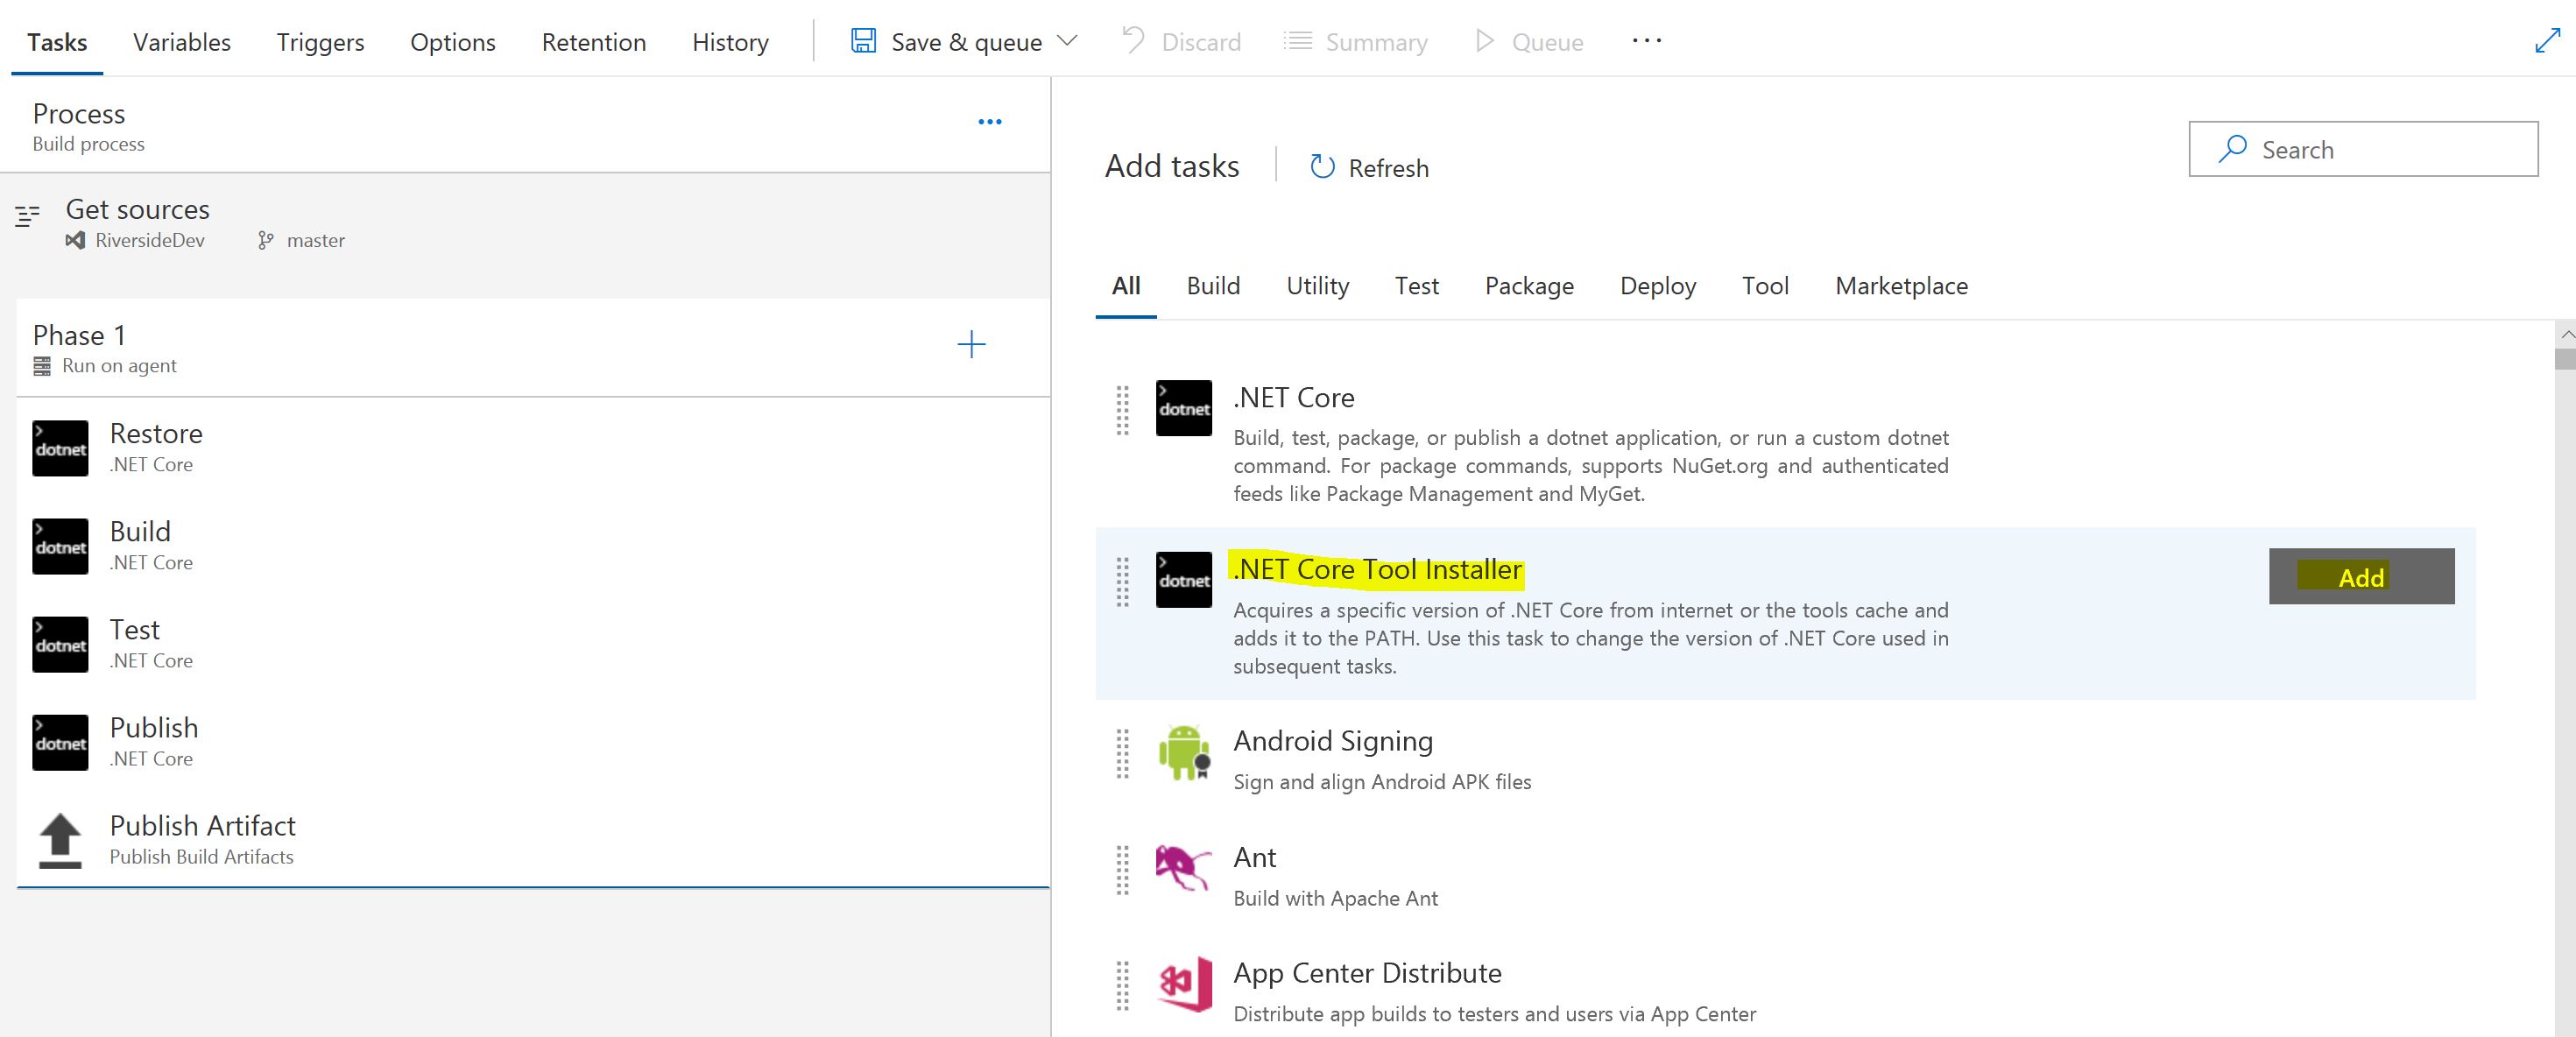
Rename this step “Use .NET Core SDK 2.1 Preview” or something similar and change the Version parameter to match below.

Note: As of this writing, .NET Core 2.1 Preview 2 was the latest version. These steps can be modified to work with whatever the latest preview version is, but getting the exact build number is a little tricky. A quick way is to visit the releases page for .NET Core and scroll across to the “blob-sdk” column of the version you wish to use, and use the build in the file name there as the build version number since that matches usually. A screenshot of that page is below for reference.

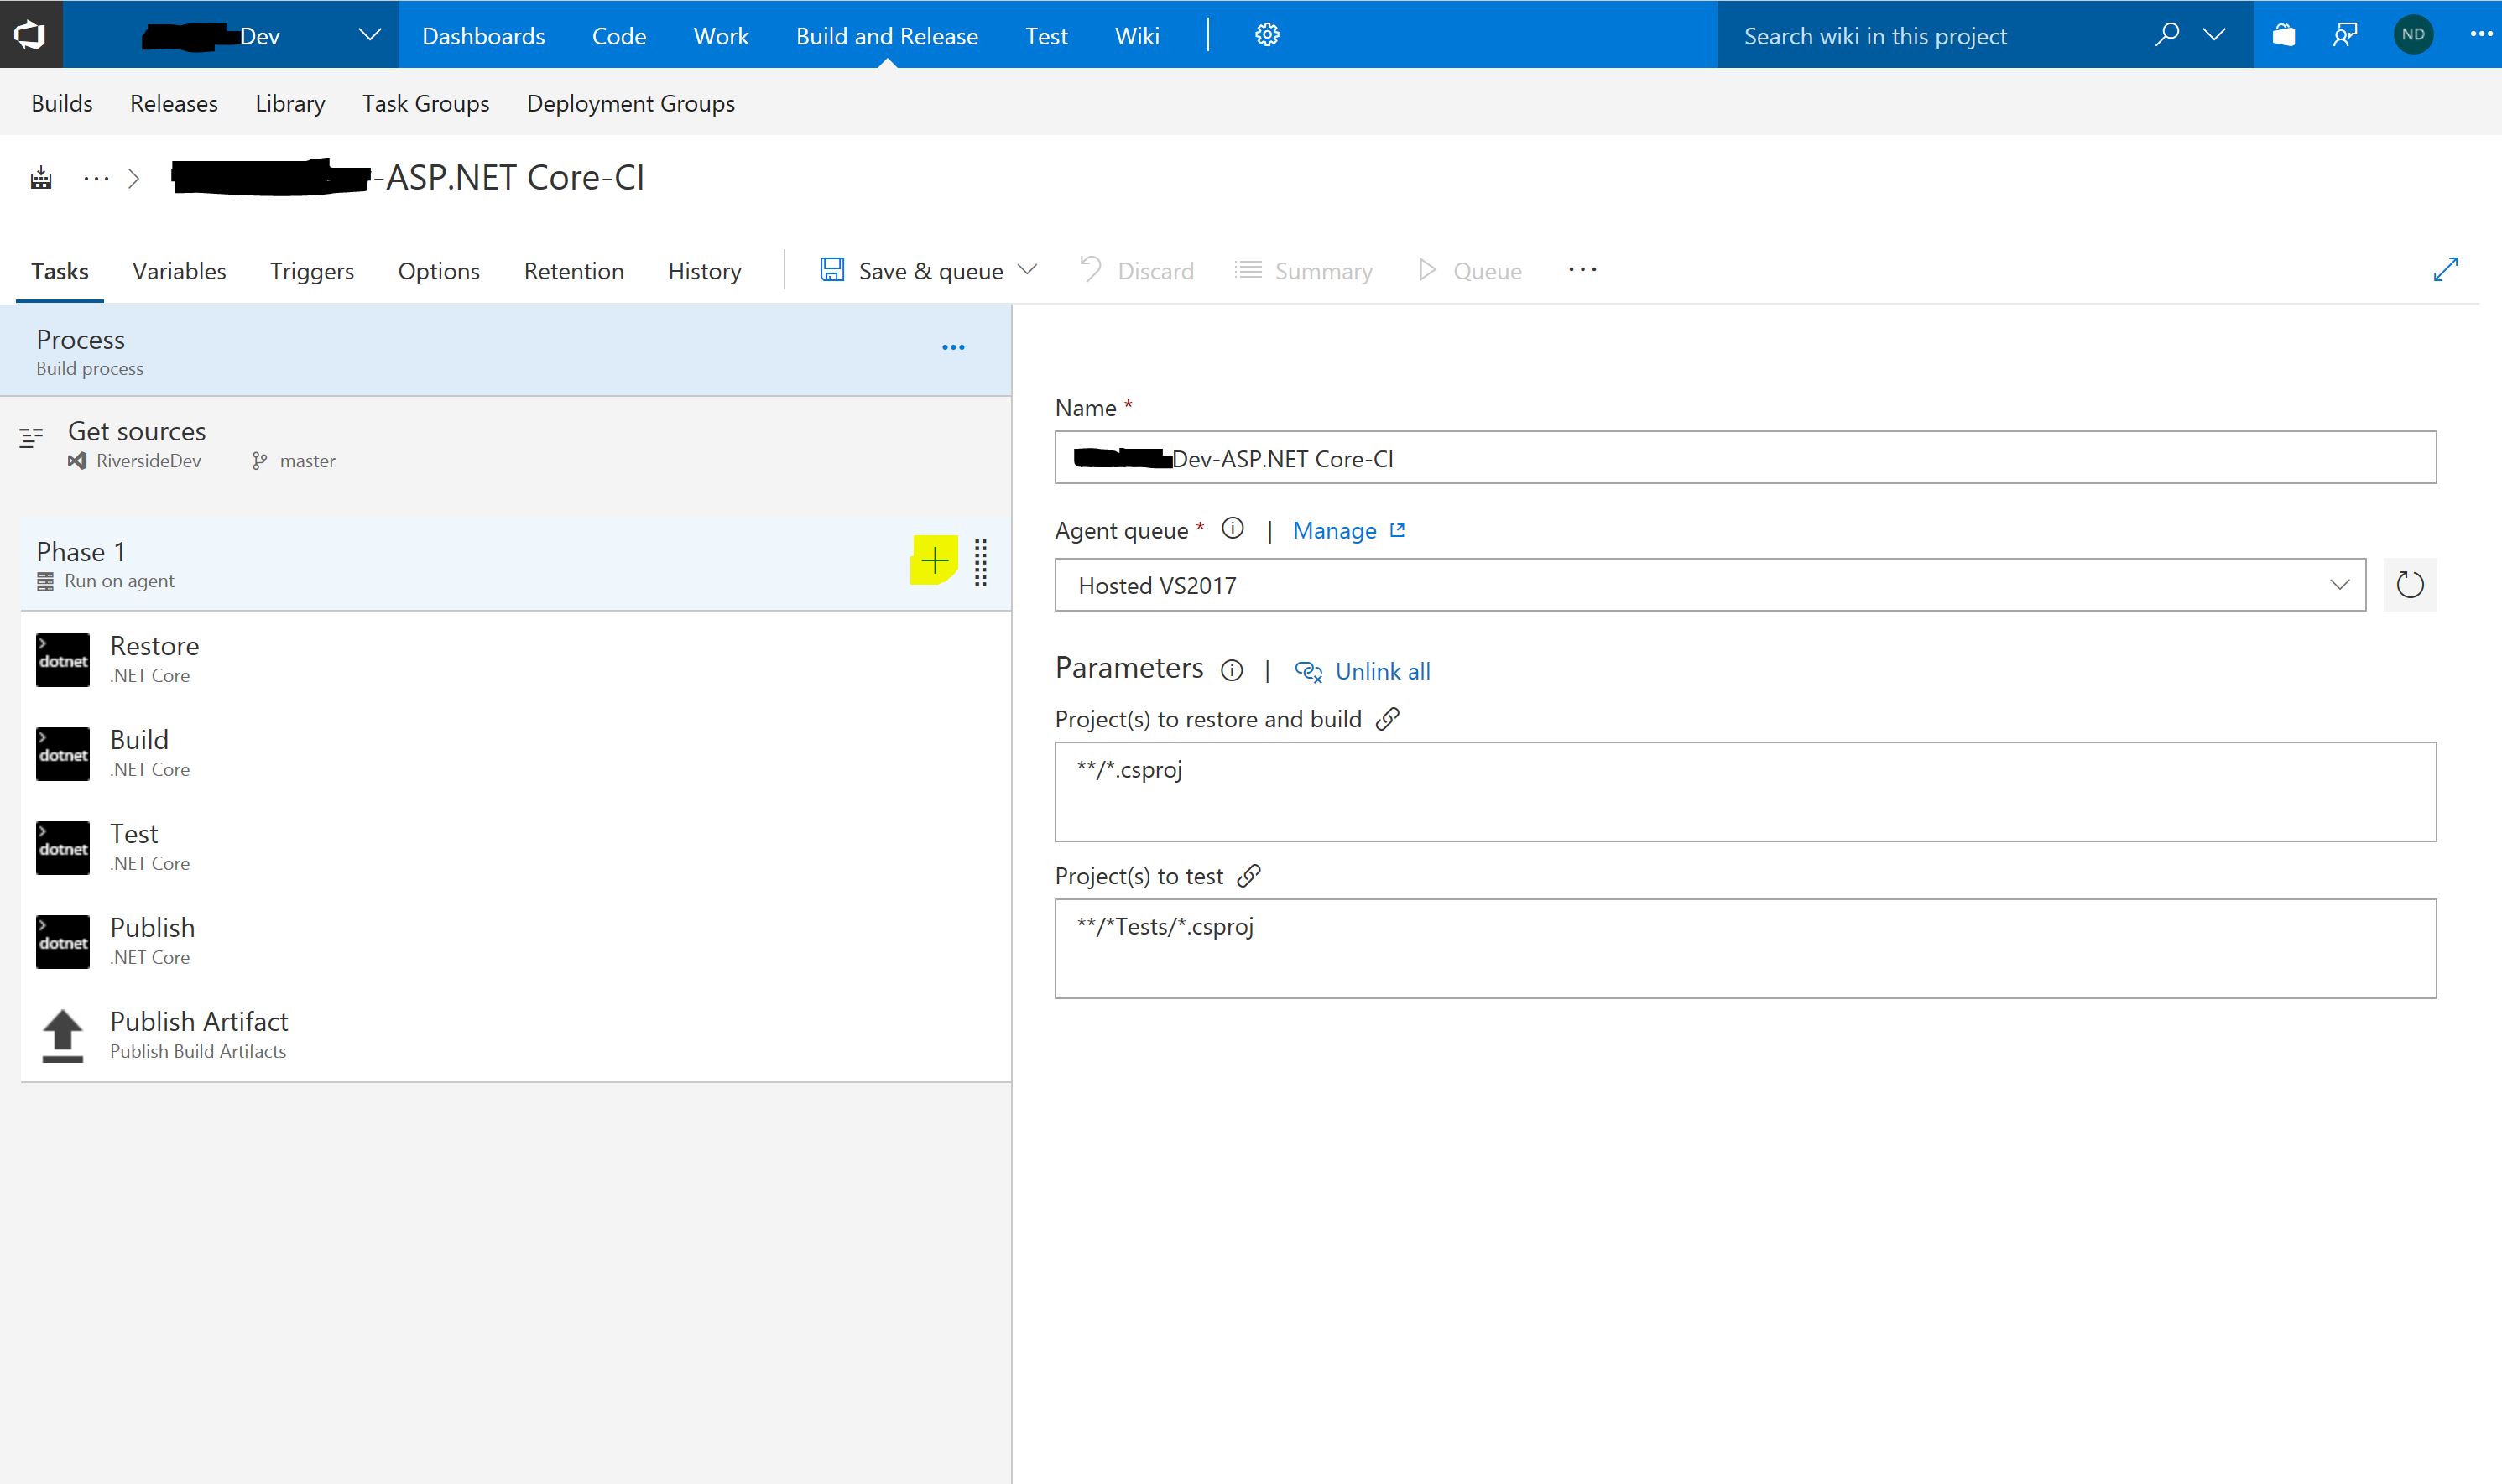
Now under the “Publish” step, since our .NET Core React template doesn’t have a web project being generated, we instead uncheck the “Publish Web Projects” checkbox, and instead tell it the path to our project file (in this case our path matches ‘*/*.csproj’). This step was revealed thanks to comments by AMETWALLY on this blog post on Visual Studio blog.
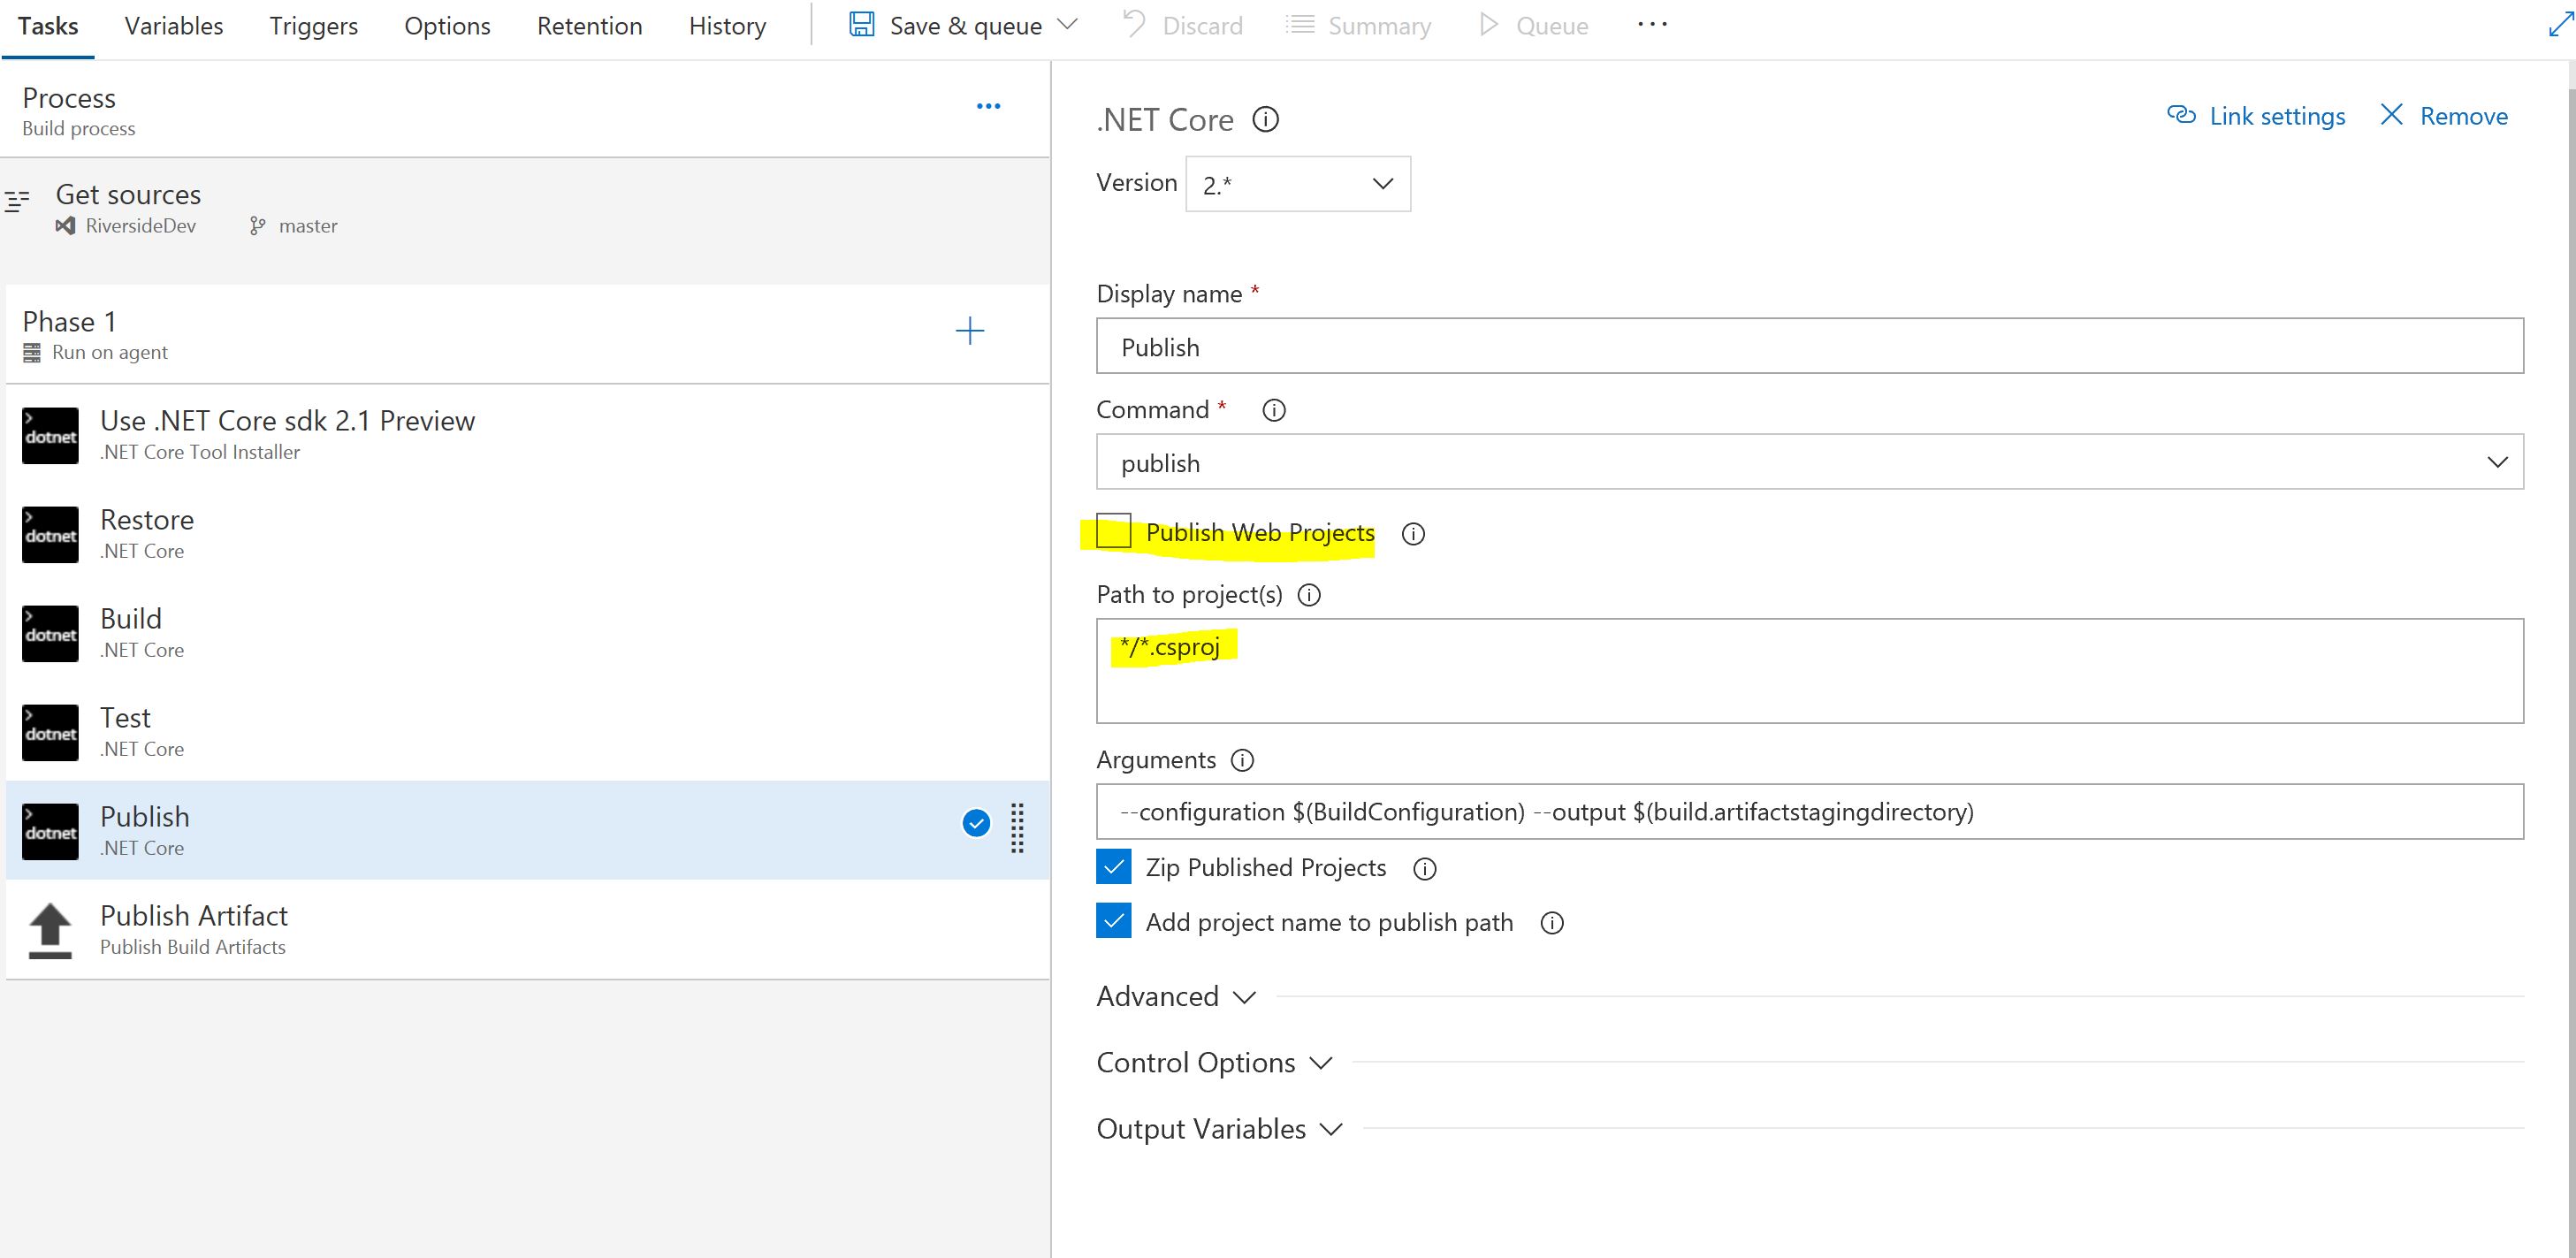
So that’s it, we now click the “Save and Queue” button, select a build agent (the default Hosted VS2017 is fine), add a comment to track what we changed before we saved and click “Save and Queue” and this should Queue our build.

When we return to our page we should see something like the text in green below. Clicking on the Build number will give us details on the progress of our build.

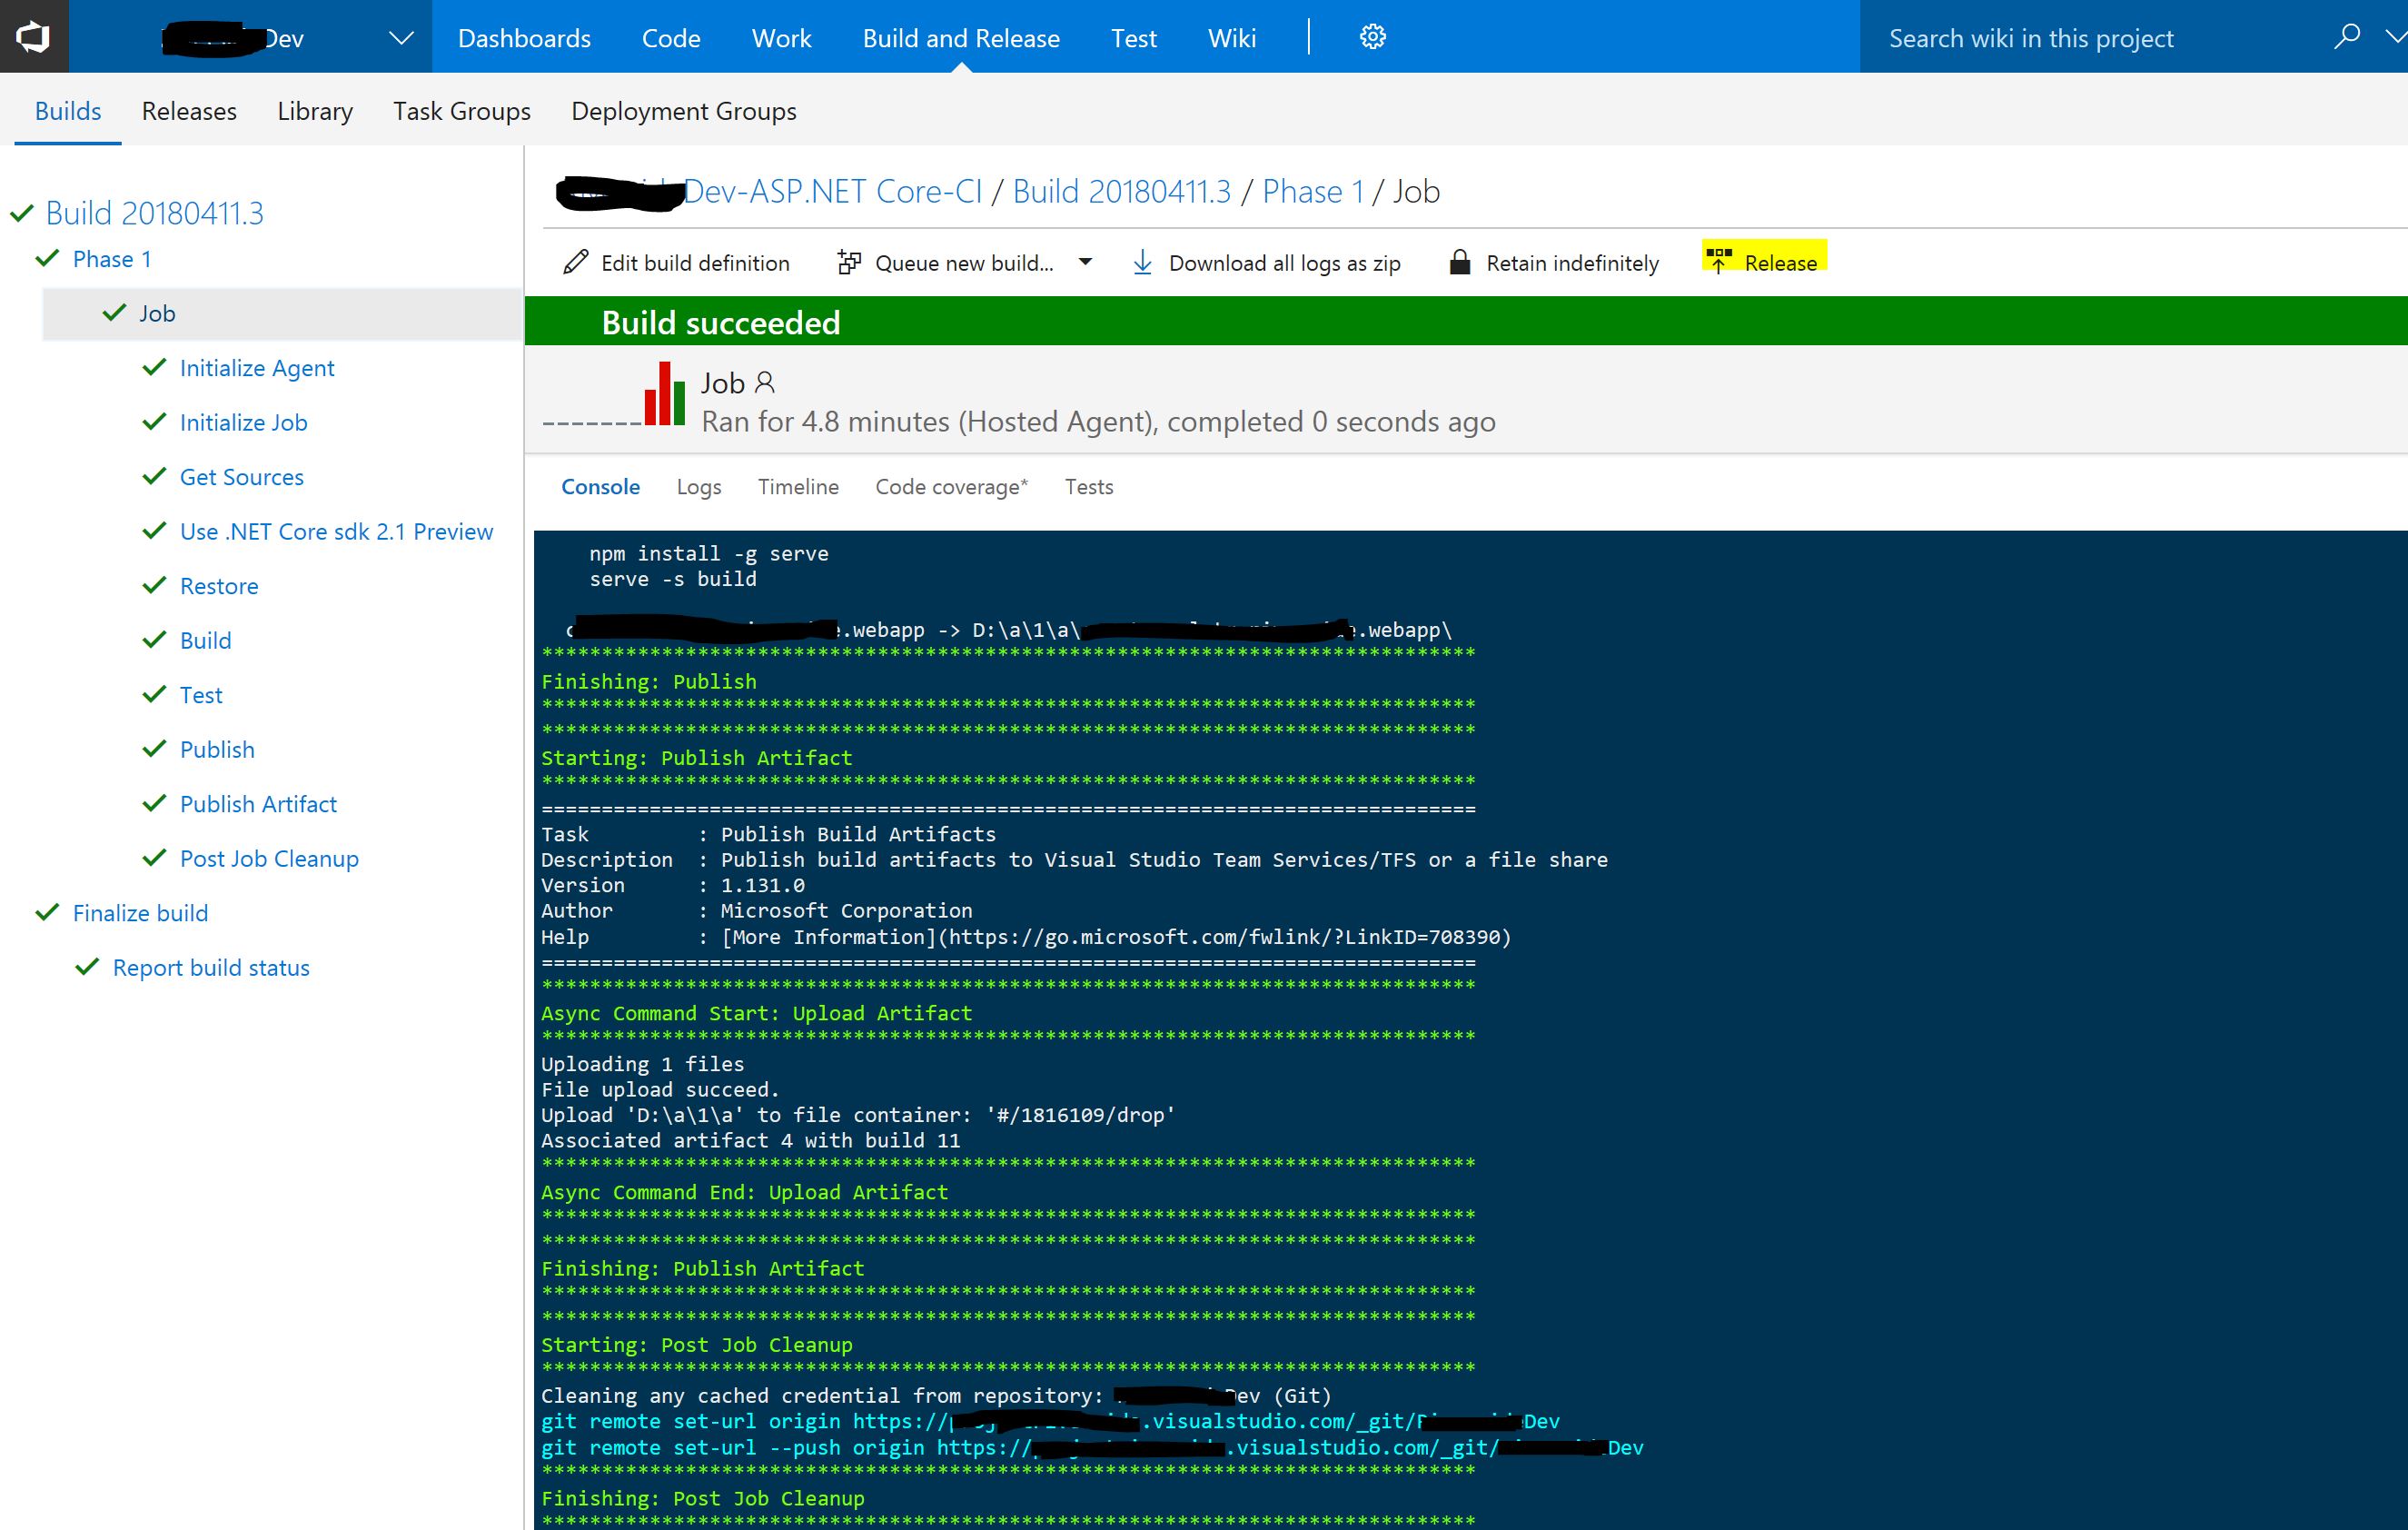
Once our build is successful we should get a screen like below. We can now move on to releasing our build to our previously setup Azure environment by clicking the “Release” button.
From here we’re presented with another wizard which has pre-populated our “Artifacts” with our successful build, and is awaiting us to select an environment to release to. I’ve chosen to name mine “Azure Environment” and then clicked “1 phase, 1 task” so I can set the details.

From here we’re presented with several release templates, we’re going to select “Azure App Service Deployment” and click “Apply”

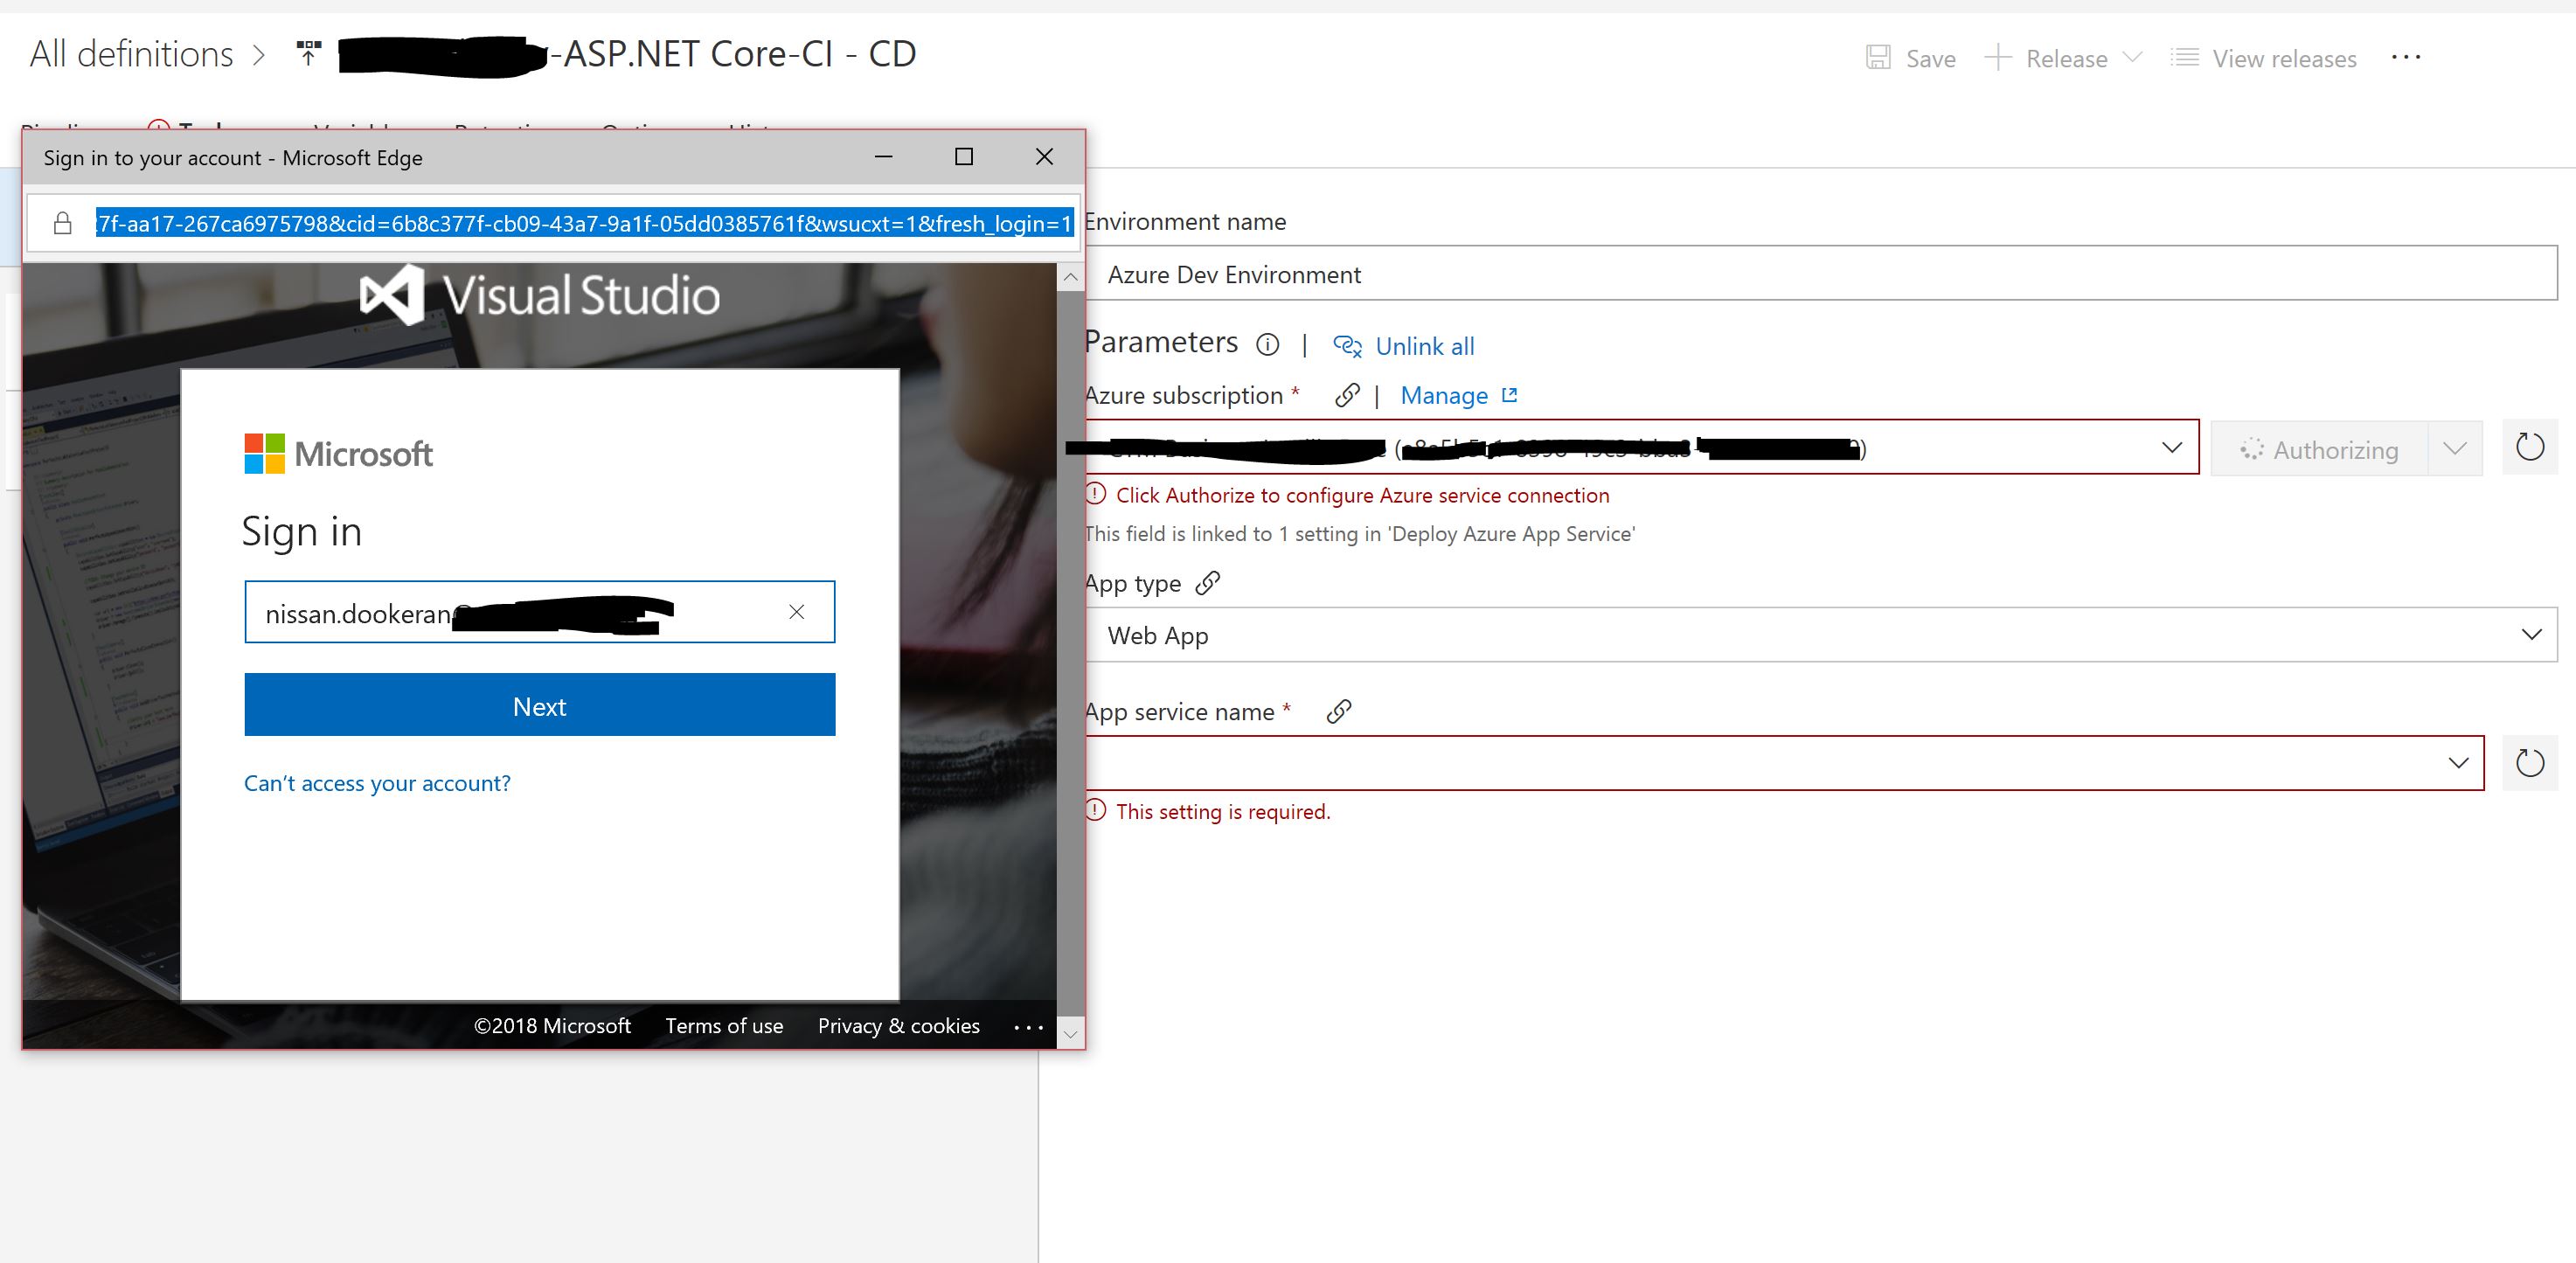
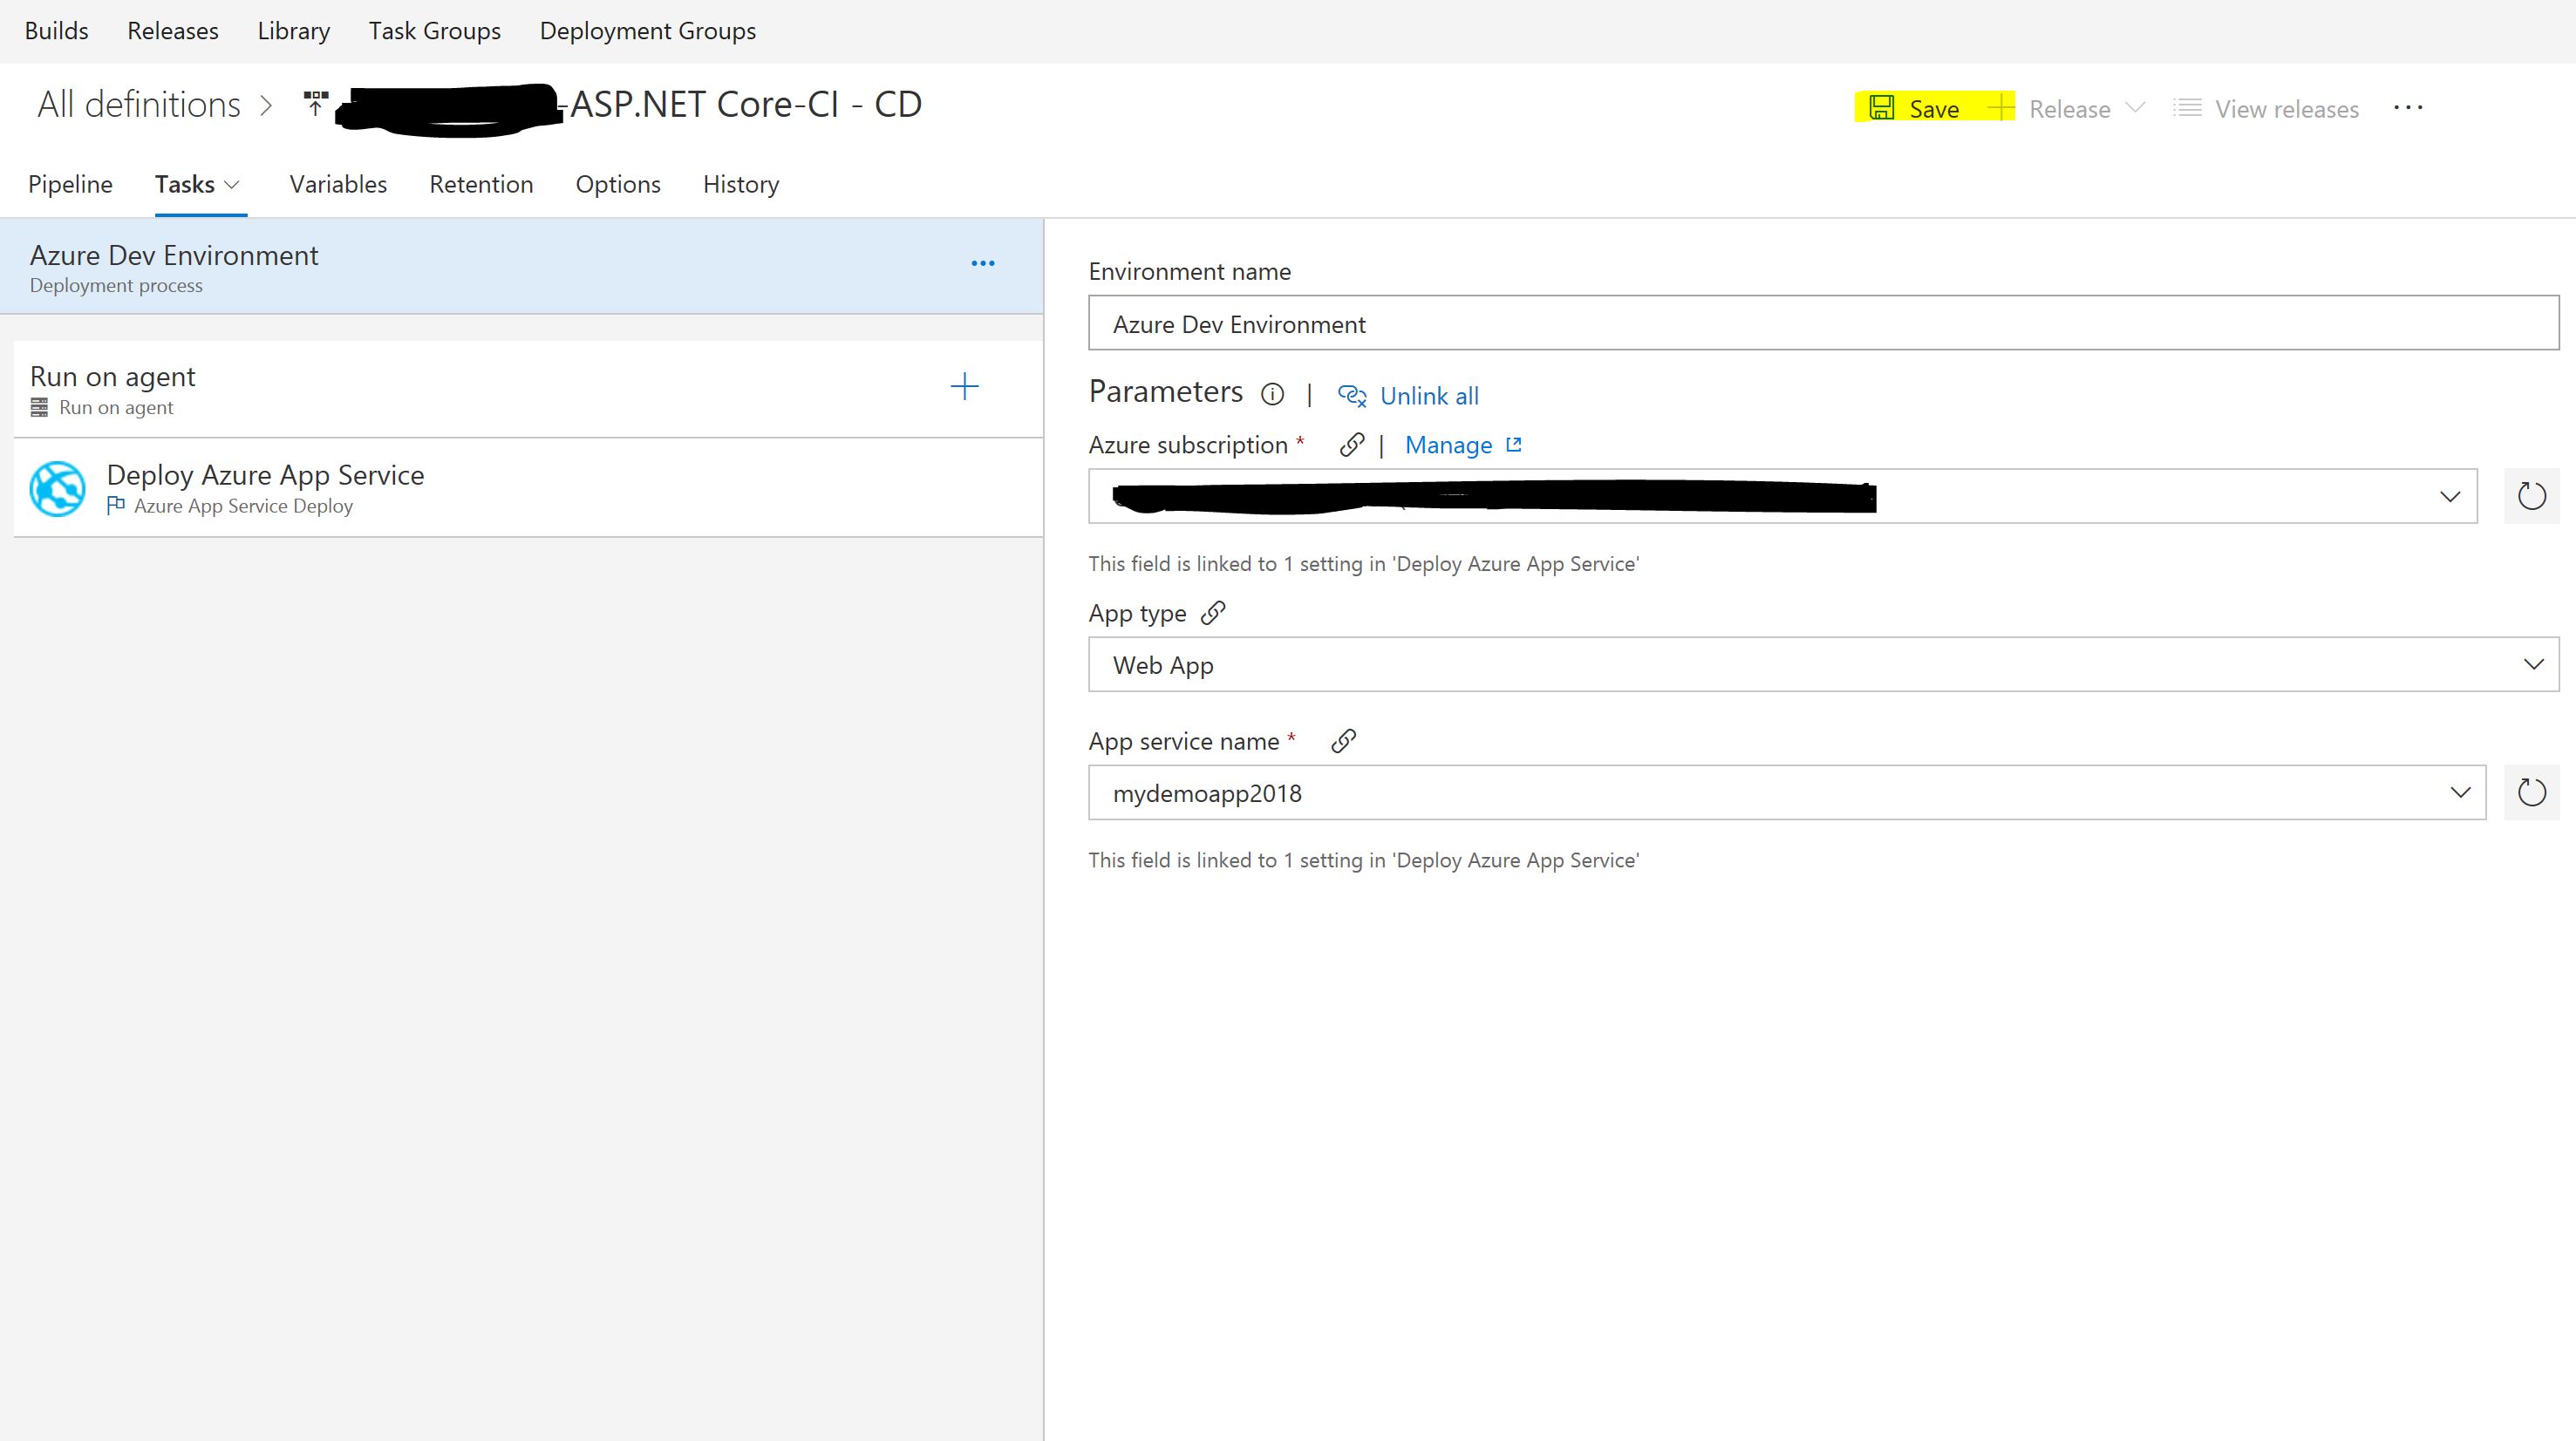
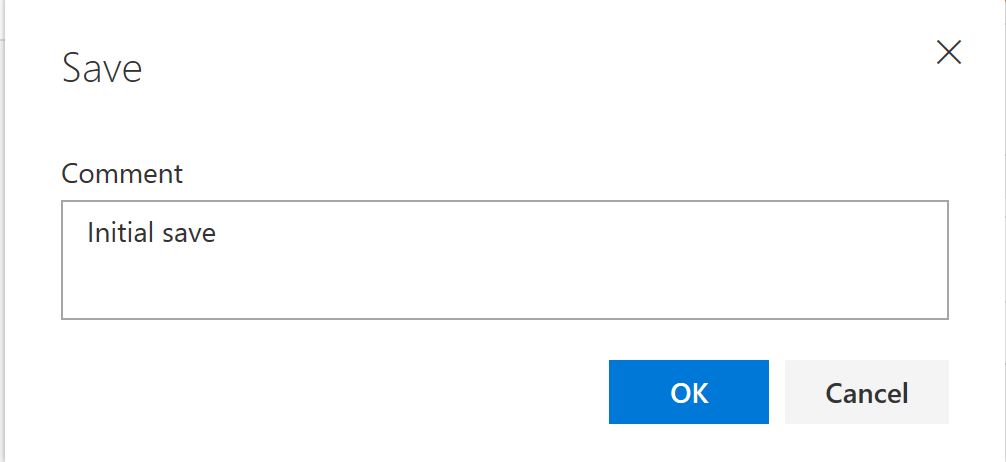
From here we’re going to be asked to tie in our Azure subscription and web app to the appropriate parameters for the release. To connect to Azure the first time, when selecting an account the wizard will prompt you to “Authorize” after which a permanent connector will have been created which you can use instead for subsequent Releases (e.g. to Dev, Staging, Canary etc type environments). Once all the parameters are filled, we click the “Save” button, and enter a Save message to describe what we’ve done.

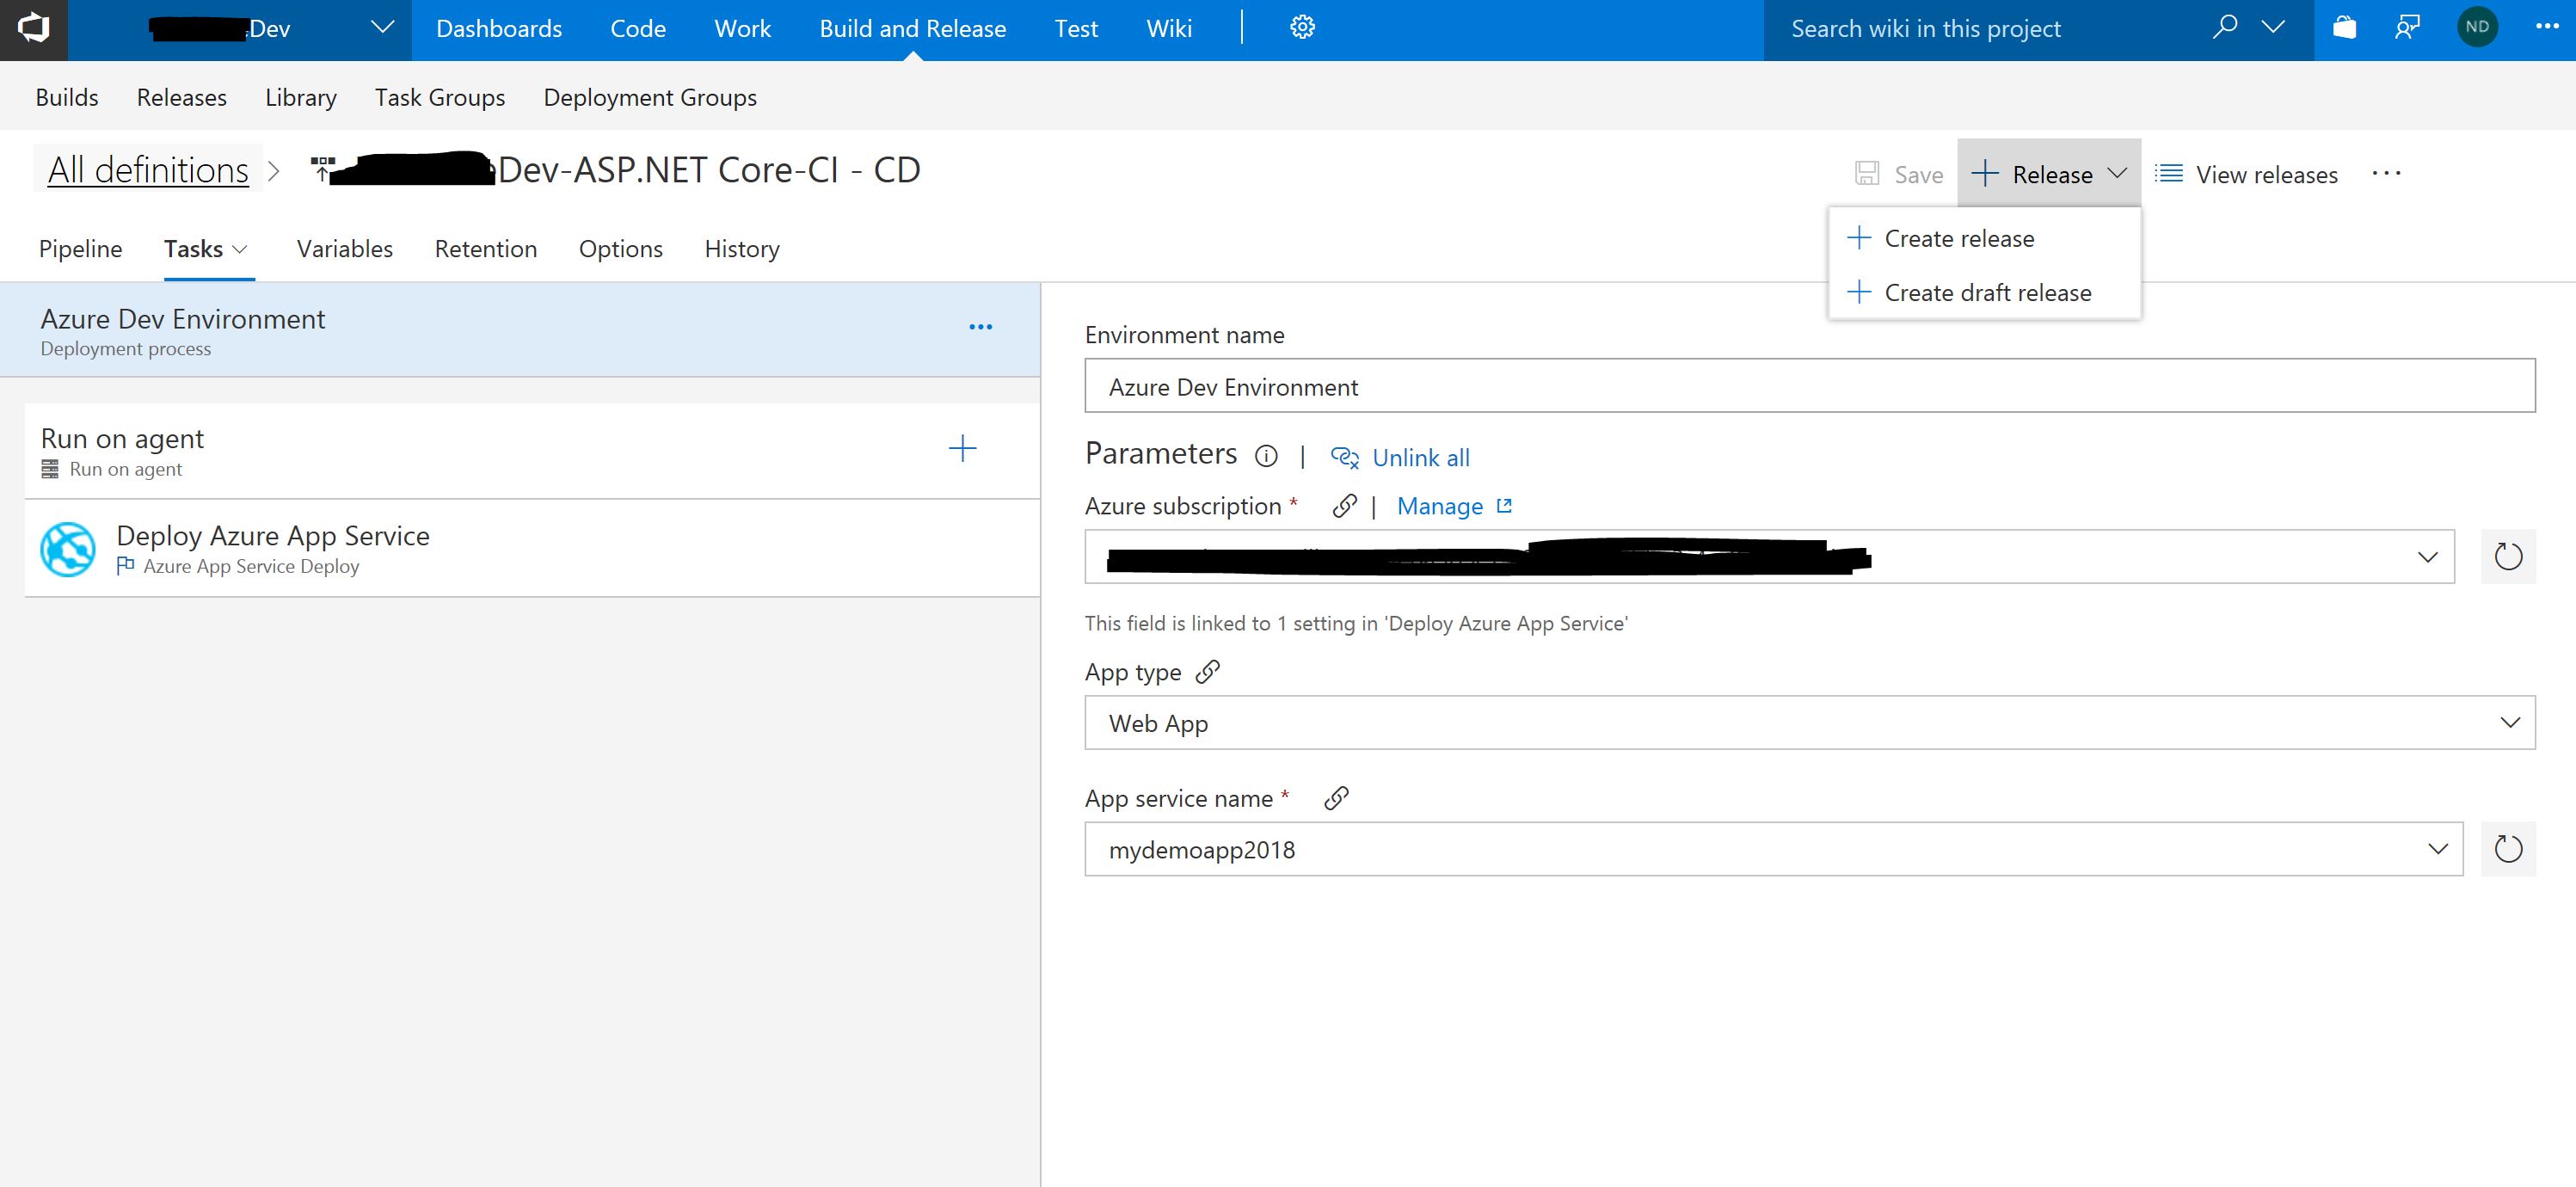
Now that we’ve succesfully saved, the “Release” button is enabled, and we can now click Release–>Create Release to initialize a release to our Azure Web App.
After we validate the release process, enter any description for this release we have, and click Create the release process is queued.

A green box with the name of the Release should appear at the top of the page. Clicking the release name will give us the release status page.
![]()
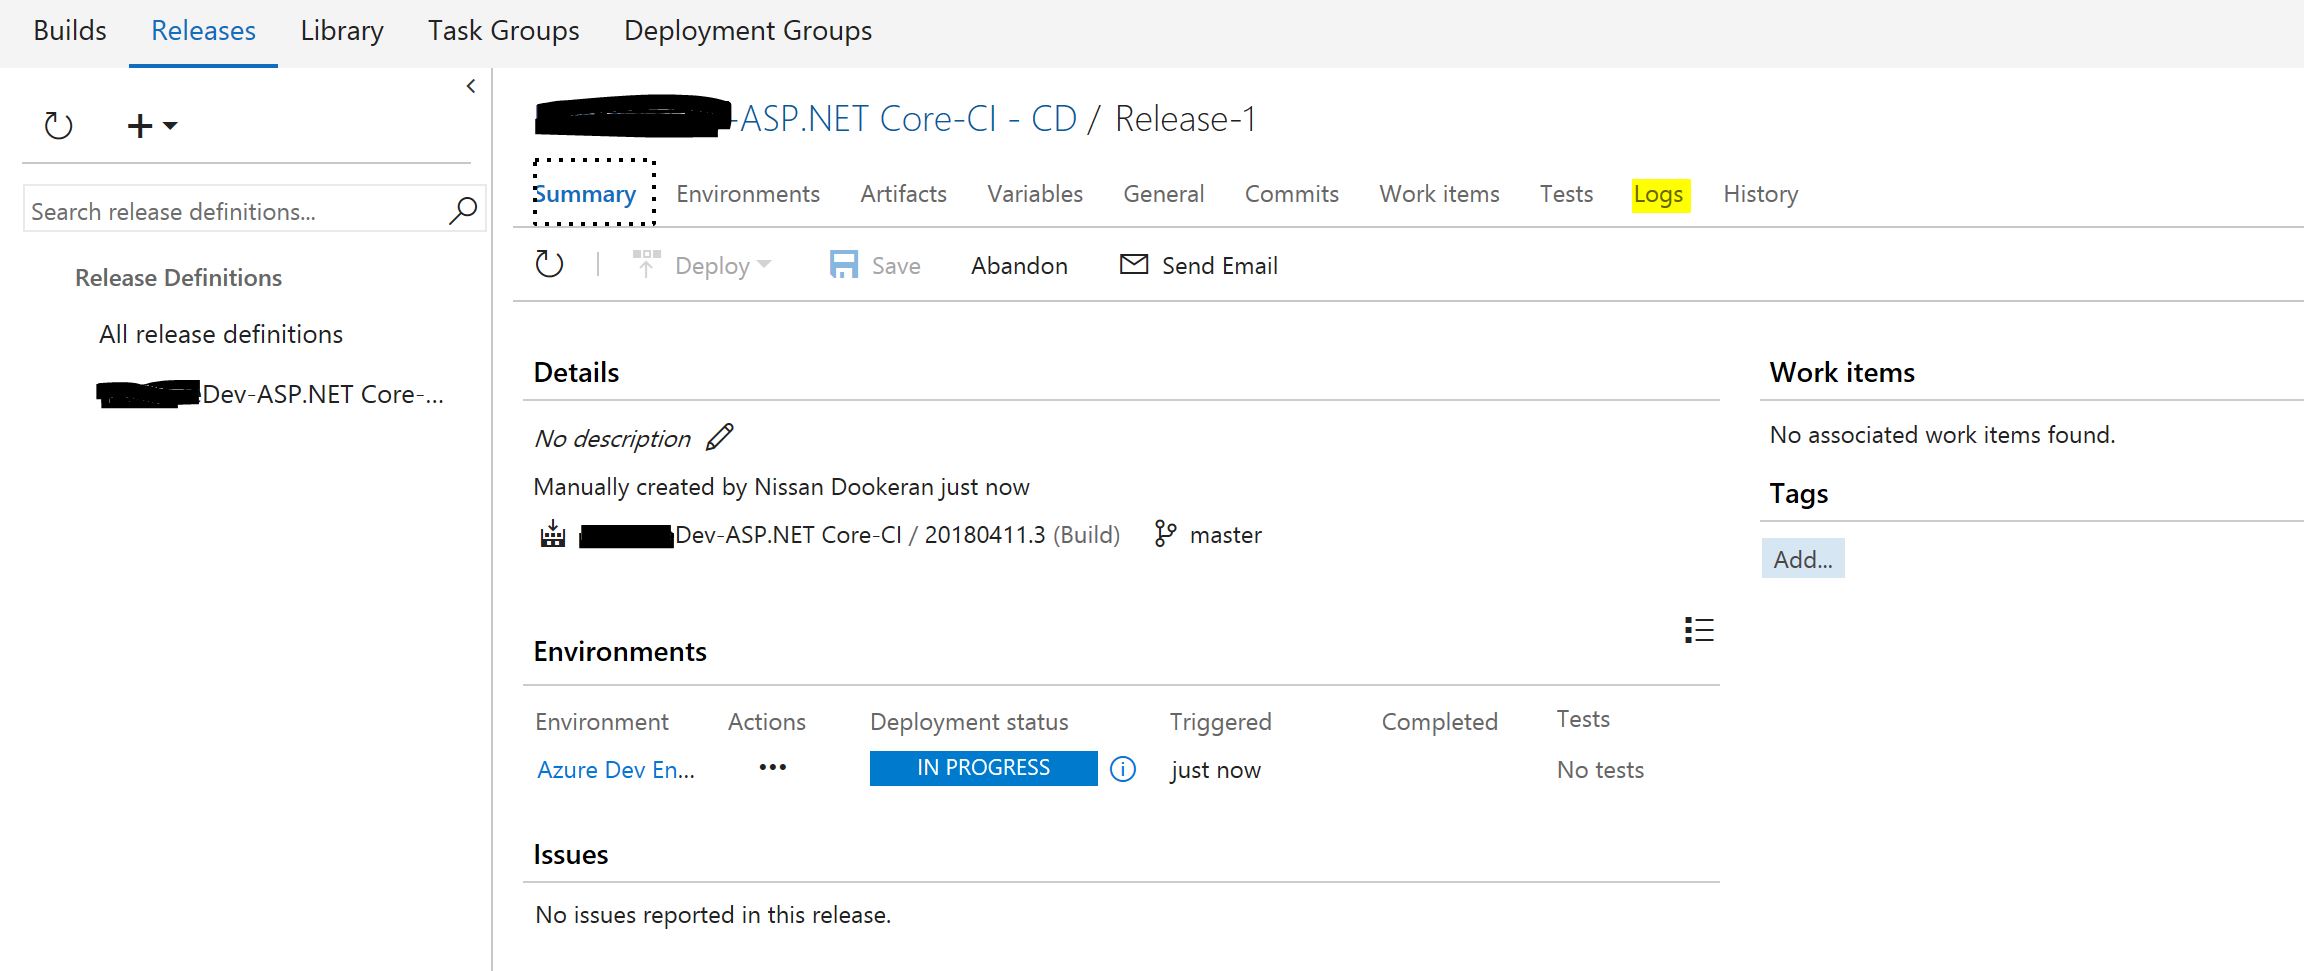
From here, we can click the “Log” tab to see real time our release cycle, which if successful will produce a screen similar to below indicating our release was successful.

Now if we load the URL of our Azure Web App we should have a fully deployed .NET Core 2.1 Preview 2 based application consisting of a React driven project front end and a .NET Core Web API driven project for backend services.
I hope this was useful to you. If there are any tweaks, recommendations or steps I should have considered to optimize this (other than using an Azure DevOps project to start, which I’m hoping will work soon for me), please let me know in a blog comment or email/twitter comment.
