One request that came from my last post on my image classifier for Trinidad and Tobago Hummingbirds was for a walkthrough of how to host the Fast.ai driven classifier in Azure. This is my attempt to document the steps.
Firstly, you will need an Azure account, which is free to sign up and which I believe you can get up to $100 free credit to start with when you sign up as a student. This should be enough for this task, as we will be using the “Azure Websites for Containers” feature, but note that the lowest tier hosting for this estimates costs approximately $40 USD a month based on the Azure pricing calculator. To get recurring monthly free credits the options include buying a Visual Studio subscription (which will get you at least $70 in credit a month) but I am not sure what the options are for students other than the one time free credit which expires 12 months after signup.
You will also need at least a free Dockerhub account. Docker Hub is the container hosting repository which we will reference from our Azure Website for Containers configuration to tell it where to get its Docker image from. Usually once you have installed Docker you’d be required to setup an account in Dockerhub to be able to pull images.
For learning, using the Cougar or Not repository on Github whose author deserves much credit for his work, was excellent for getting a starter Dockerfile as well as Fastai driven app since it includes the model file, although some modification to the app was needed to work with the updated Fastai libraries, the steps of which are documented in Fastai forums and in a pull request that is pending acceptance to the main branch of his repo.
Once you get this app running, it’s easy enough to rewrite the code bits in cougar.py for your own model once you’ve downloaded the model file (usually a .pth extension file) from the server you trained the model on. My fork of Cougar or Not has my modified code for the hummingbird classifier if you want to take a look at just how simple that is to learn, as I didn’t use python or Starlette until recently myself.
So with infrastructure done, let’s take a look at the technical bits. If you’re familiar with Docker, great! If you’re like me and know it but only used it passively and locally, the documentation page gave me the exact commands I needed to build and run the Dockerfile on my local machine without issue and publish it to my Dockerhub repository.
Assuming you have Docker installed (if on Windows PC check here) locally, from a terminal (or command prompt) in the folder for your app you build the .Dockerfile using
docker build -t <imageName> .and can then run the image locally using
docker run -p 4000:8008 <imageName>to test and make sure all our custom bits are working (the app runs on port 8008, but the mapping above lets you run on http://localhost:4000).
I then logged in to Dockerhub with
docker login
and after customising the running app for my model I then tagged it with my proposed repository image name with
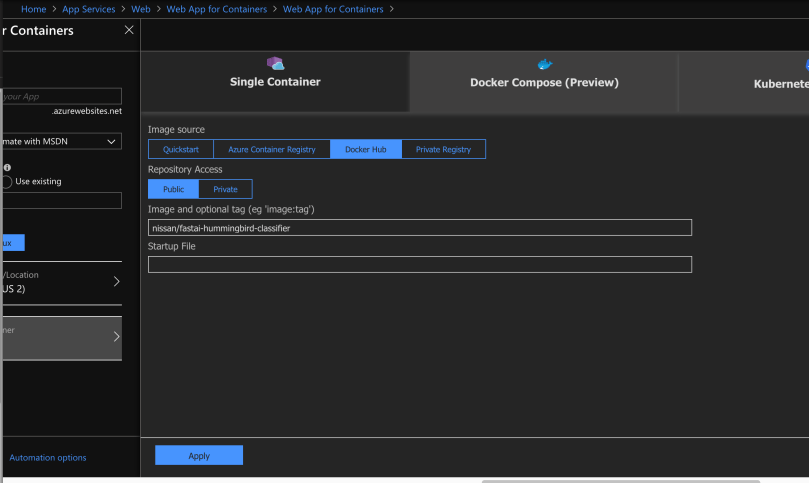
docker tag image username/repository:tagso in my case this was docker tag hummingbird nissan/fastai-hummingbird-classifier
before publishing it to Docker Hub with
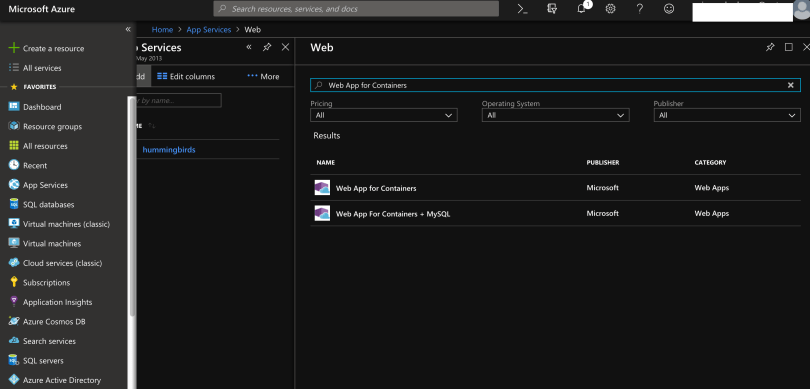
docker push username/repository:tagSo with the Docker part completed, I then logged in to the Azure portal and created a new Azure Website for Containers app.
There are some bits to configure, like configuring the URL (<name>.azurewebsites.net) and choosing the container type (Linux) but there are a few key steps here is to get it working with your Dockerhub published container and to keep it on the lowest priced tier so you don’t burn out your credits.

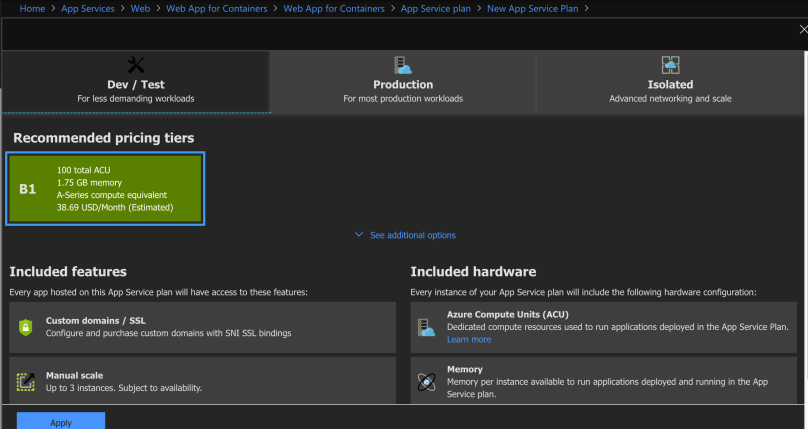
The first step is to expand the “App Service plan/location” setting and create a new App Service plan in the wizard settings that use the Dev/Test workload settings, and not the default plan which uses a Premium (aka higher cost) subscription which you don’t need for testing. I selected the B1 plan, unfortunately there are no “free” website app plans for Linux containers but this is the cheapest I identified.
With this set, we look at the Configure Container screen and point it to our Docker Hub published image.
Then we click Apply and OK to complete the creation of our new Azure Web App for Containers app. After a few minutes it should be up and running, but remember the image file is about 750MB so it will take a little while after Azure indicates it completed creation and publishing of the app URL for Azure to pull in the container image and actually start it running.
You can check the log file in the Azure portal to verify your container pull has completed and is loaded before trying to load the site.

You should then have your container running inside the Azure URL you specified.

If you want to do more advanced setups there’s sufficient documentation on using Azure for setting up a DevOps pipeline and other production-level tips as well. Happy hacking!
